How to configure Single Sign on using Azure Active Directory (SAML2.0)

How to configure single sign-on using Azure AD (SAML2.0)

This guide will walk you through a standard SSO integration with Azure Active Directory as the Identity Provider (IdP) and ITM Platform as the Service Provider (Sdp). Before proceeding, we advise you to get familiar with the Single Sign-On process in ITM Platform.

Azure configuration

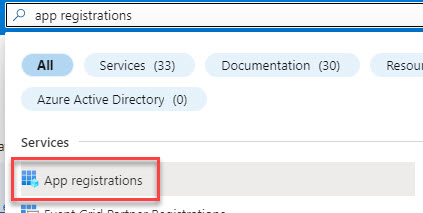
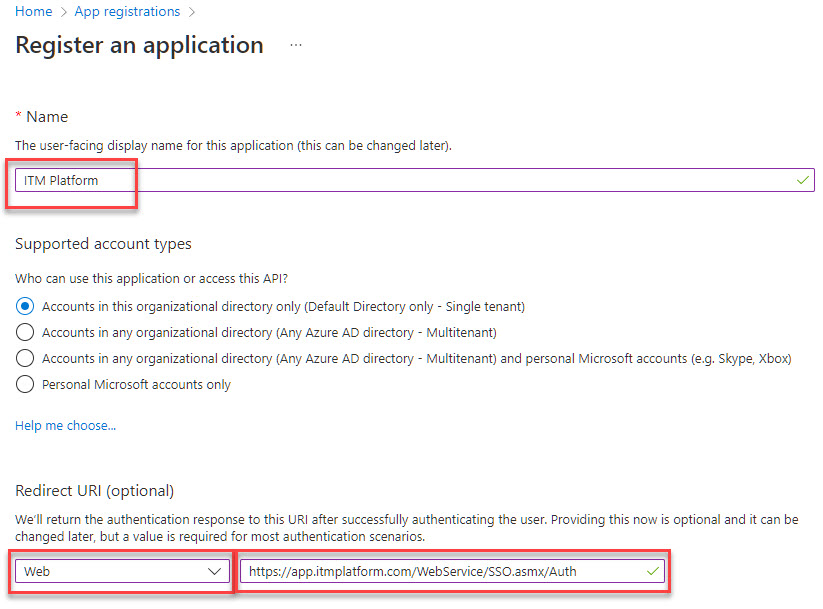
In your Azure portal, search for App Registrations and click on Create new app registration, or edit an existing one
Input a Name, and choose Web as the redirect URL, adding https://app.itmplatform.com/WebService/SSO.asmx/Auth 
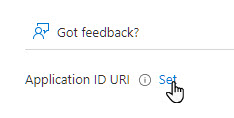
At this point, your application is generated. Now, Generate an Application ID URI by clicking on Add an Application ID:

Click on set.
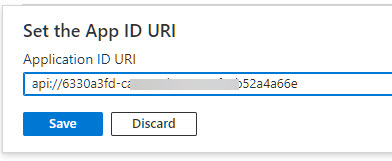
Accept the suggested URI or set your own, and save:
Click on Redirect URIs

Add https://app.itmplatform.com/ITM.Web/WebService/SSO.asmx/SignOut to the front-channel logout URL and save

Copy the previously generated Application ID URI, and the SAML-P sign-on endpoint and SAML-P sign-out endpoint. To access all your endpoints, click on the Endpoints button of your registered app.

By now, you should have 

  • Application ID URI
  • SAML-P sign-out endpoint
  • SAML-P sign-out endpoint

ITM Platform configuration

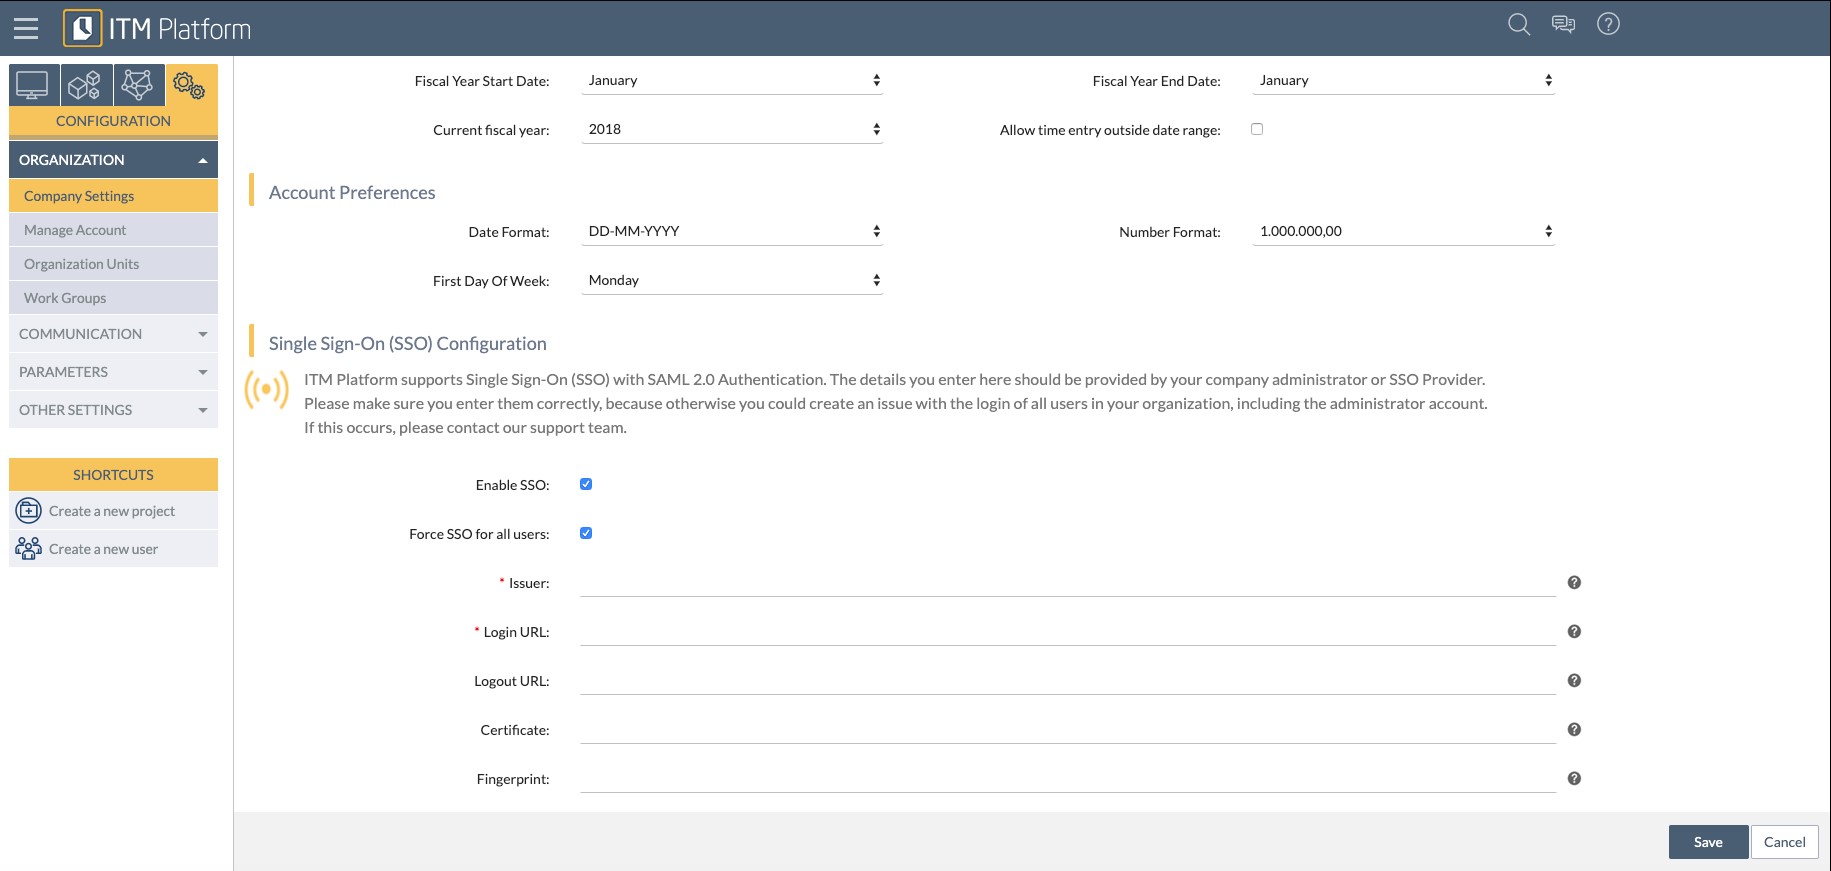
On the left menu, go to CONFIGURATION > ORGANIZATION > Company Settings. Scroll down to “Single Sign-On (SSO) Configuration”

  • Tick “Enable SSO”
  • We don’t recommend ticking “Force SSO for all users” until you have tested all works fine. Otherwise, you may be locked out. If this happens, please get in touch with support@itmplatform.com
  • Issuer: paste the “Application ID URI” provided by Azure
  • Login URL: paste the “SAML-P sign-on endpoint” provided by Azure
  • Logout URL: paste the “SAML-P sign-on endpoint” provided by Azure 
  • If you generated a certificate in Azure, paste it in the Certificate field, as well as the SHA-256 fingerprint.
  • Save

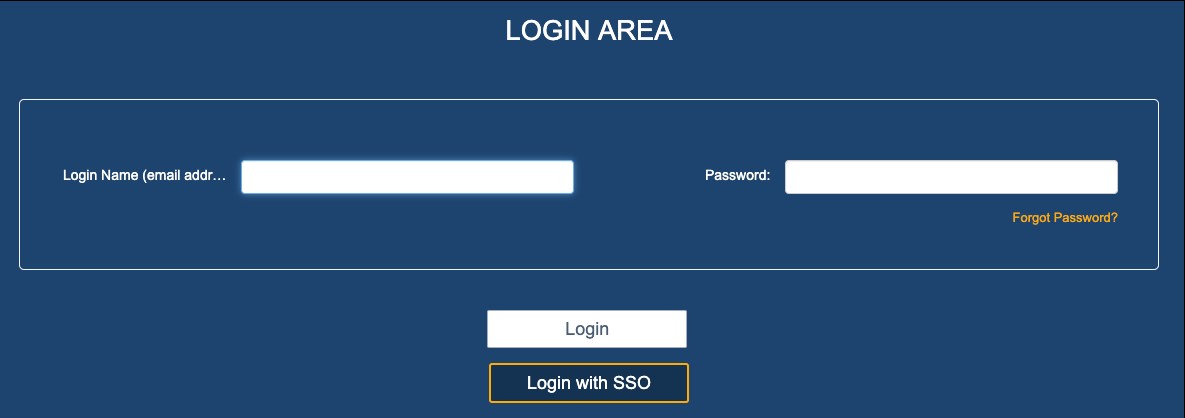
To test it, log out and when prompted on the login page, click on “Login with SSO.” You should be redirected to Azure’s login page and fill out your credentials (we recommend you select “remember me” ). You will then be redirected to ITM Platform’s home page, and from then on, clicking on “Login with SSO” will lead you to ITM Platform’s home page.

How to configure Single Sign on using Okta (SAML2.0)

How to configure single sign on using Okta (SAML2.0)


This guide will walk you through a standard SSO integration with Okta as the Identity Provider (IdP) and ITM Platform as the Service Provider (Sdp). Before proceeding, we advise you to get familiar with the Single Sign-On process in ITM Platform.

Okta configuration

In your Okta admin panel, go to Applications and Create App Application.

  • General > Edit SAML Settings > Add the App Name and, optionally ITM Platform’s logo. Click Next
  • In A – SAML Settings:
    • Single sign on URL: https://app.itmplatform.com/WebService/SSO.asmx/Auth
    • Audience URI (SP Entity ID):  https://new.itmplatform.com/
    • Name ID format: EmailAddress
    • Application username: Email
  • Scroll down to “Attribute Statements (optional)” and add the following values:
    • Name: email
    • Value: user.email (select from the dropdown)
  • Next > Finish
  • Sign-on > SAML Signing Certificates > Download the SHA-2 certificate.
  • Generate a fingerprint by pasting the full content of the certificate in https://www.samltool.com/fingerprint.php  and generate a sha256 fingerprint that will look like C0:9A:C2:27:4B:46:B8:AF:81:43:CA:65:AE:29:F5:82:E7:AB:01:C3:A9:67:37:1C:52:21:23:CE:7E:74:32:A2. Copy it.
  • On the sign-on section of your Okta application, click  “View SAML setup instructions” (right pane), and copy the values of:
    • Identity Provider Single Sign-On URL (it will look like https://xxxxxxx.okta.com/app/xxxxxitmplatform_xxxxx/exk71wyb72noECfvv5d7/sso/saml
    • Identity Provider Issuer (it will look like http://www.okta.com/exk71wyb72noECfvv5d7)
    • X.509 Certificate

You now have your Okta application all set up and the values you need to configure ITM Platform’s SSO.

ITM Platform configuration

On the left menu, go to CONFIGURATION > ORGANIZATION > Company Settings. Scroll down to “Single Sign-On (SSO) Configuration”

  • Tick “Enable SSO”
  • We don’t recommend ticking “Force SSO for all users” until you have tested all works fine. Otherwise, you may be locked out. If this happens, please get in touch with support@itmplatform.com
  • Issuer: paste the “Identity Provider Issuer” provided by Okta
  • Login URL: paste the “Identity Provider Single Sign-On URL” provided by Okta
  • Certificate: paste the “X.509 Certificate” provided by Okta
  • Fingerprint: paste the fingerprint you generated earlier.
  • Save

To test it, log out and when prompted on the login page, click on “Login with SSO.” You should be redirected to Okta’s login page and fill out your credentials (we recommend you select “remember me” ) . You will then be redirected to ITM Platform’s home page, and from then on, clicking on “Login with SSO” will lead you to ITM Platform.

Single Sign-on (SSO)

Single Sign-On (SSO)

Introduction

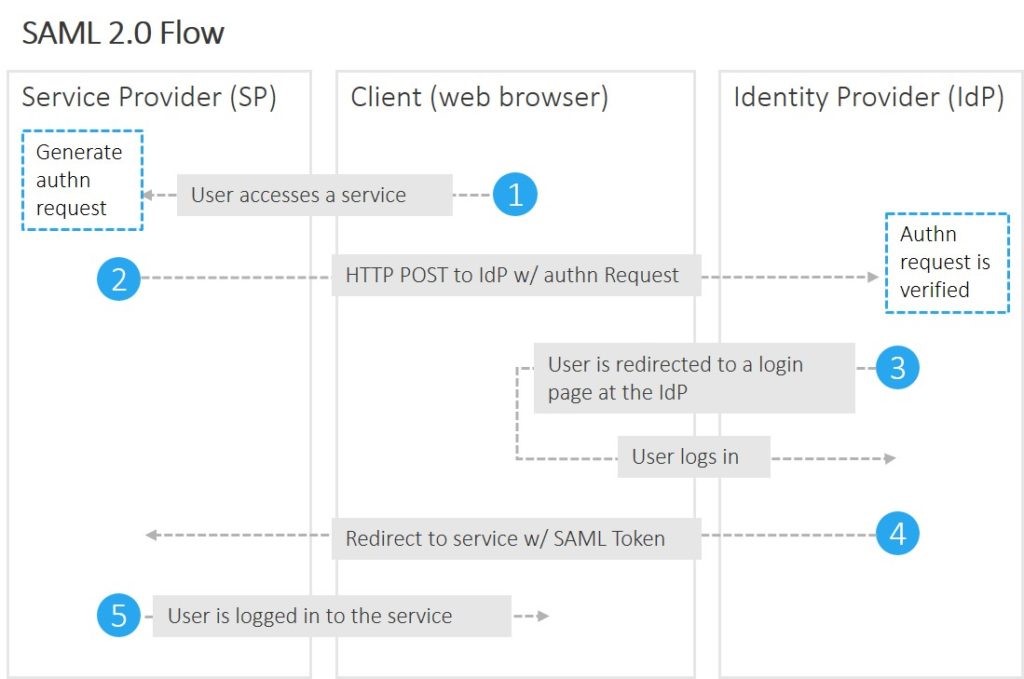
Single Sign-On (SSO) is a session and user authentication service that permits a user to use one set of login credentials (i.e, name and password) to access multiple applications.

Single Sign-On can be enabled in your company account by request. When enabled and configured, users can access ITM Platform with their corporate credentials. Once you have Single-Sign-On, the username and password for the user are managed by the identity provider (IDP) of the user’s company or a third party SSO solution.

For the user, this means if they access Single-Sign-On from the ITM Platform login page they will be redirected to a login page provided by their own company. If authentication is successful, the user will be sent back to ITM Platform and logged in.

Characteristics of using Single-Sign-On at ITM Platform

The Single-Sign-On at ITM Platform has the following characteristics:

  • ITM Platform supports SSO based on SAML 2.0, which includes solutions like Microsoft ADFS, Office 365 / Azure AD, Auth0.
  • The e-mail address that is used at the IDP should be identical to the e-mail address of the ITM Platform user. As a minimum, the e-mail address should be included within the manifest.
  • When using SSO with ITM Platform, users need to be created in both ITM Platform and at the IDP server. User roles and permissions in ITM Platform also need to be configured in ITM Platform.
  • SSO can be made either optional or mandatory from the Company Settings Page.
  • When a user is blocked at the IDP, they will not be able to log on in ITM Platform using SSO.
  • Once enabled, the SSO configuration can be modified by any Full Access user.

Setting up SSO

If you want to enable SSO in your ITM Platform account, please contact ITM Platform support. Once enabled, please follow the steps listed below to set up your SSO.

Configuration at your company´s IDP/SSO provider

To add ITM Platform as a service provider, you typically need to add an SSO application to your SSO solution.

Depending on the type of SSO solution, the exact names/terms can vary when it comes to information that is requested. To set up the application, complete the following details:

Setup of ITM Platform

Browse to Configuration – Organization – Company Settings and scroll to the bottom of the Company Settings page.

Fill in the required fields:

  • Force SSO for all users: when this setting is enabled, Single-Sign-On will be the only and mandatory option for all users in your organization. When this setting is disabled, users can choose whether to use the regular ITM Platform login or use SSO by clicking the button “Login with SSO” at the ITM Platform login page.
  • Issuer: same as the Application ID URI/Issuer ID provided during the setup on your SSO solution
  • Login URL: corresponds with the SSO login page of your company. This value should be provided by your company admin or SSO provider.
  • Logout URL: this value is only necessary if you would also like to logout of your SSO provider when logging out of ITM Platform. Therefore, this setting is optional. The value should be provided by your company admin or SSO provider.
  • Certificate: this setting is optional but should be completed if you either want to encrypt the communication between the ITM Platform Service Provider (SP) and the IDP or when it is mandatory with the IDP. The certificate should be provided by your company admin or SSO provider.
  • Fingerprint: this setting is required when using a certificate. The fingerprint should be provided by your company admin or SSO provider. You can also use a fingerprint generator like https://www.samltool.com/fingerprint.php to generate it from the certificate,

Once you are sure that all settings are correct, enable the tick-box “Enable SSO” and save. Please note that if you provide an incorrect Login URL and have enabled the setting “Force SSO for all users”, you will not be able to log in to ITM Platform. Therefore, we recommend testing the settings first without this option enabled.