Using parameters in API calls from Excel cells (named ranges)
We have seen how to create graphs and reports calling the ITM Platform API from Power Query for Excel. With these techniques, you can extract and shape all the necessary information, but we needed to be able to customize calls to the API with parameters to – for example – send the user name and password, or filter results.
In this article we will explain how to do it through cells, or “named ranges” in Excel. The basic idea is to set up the worksheet to allow the user to enter data that will be later used by Power Query in the call to the ITM Platform API.
These are the steps:
1. Give a name to each cell
Cells (or ranges) in Excel can have a name. It will be the reference that we’ll use later in Power Query
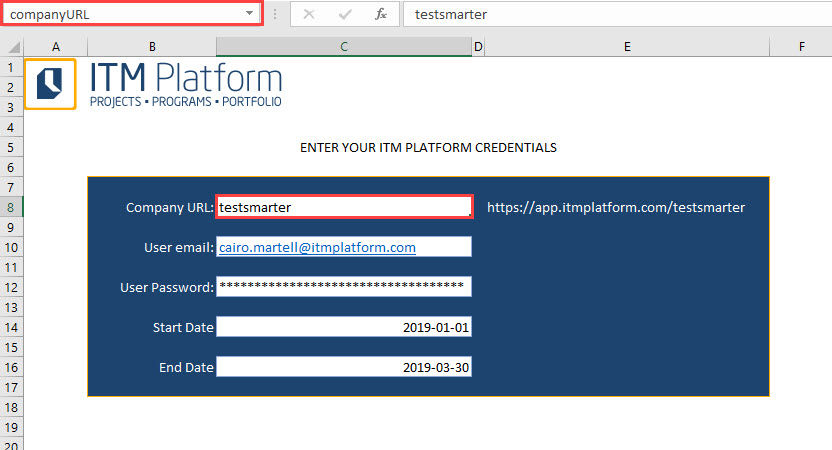
In the example, we have named companyURL (in the picture), email, password, datein and dateout.
Tip: so the password is not visible directly in the cell, we set the custom format **;**;**;** Please note that this is not a secure way of storing passwords. Hiding and protecting the worksheet will help, but the password will still be accessible
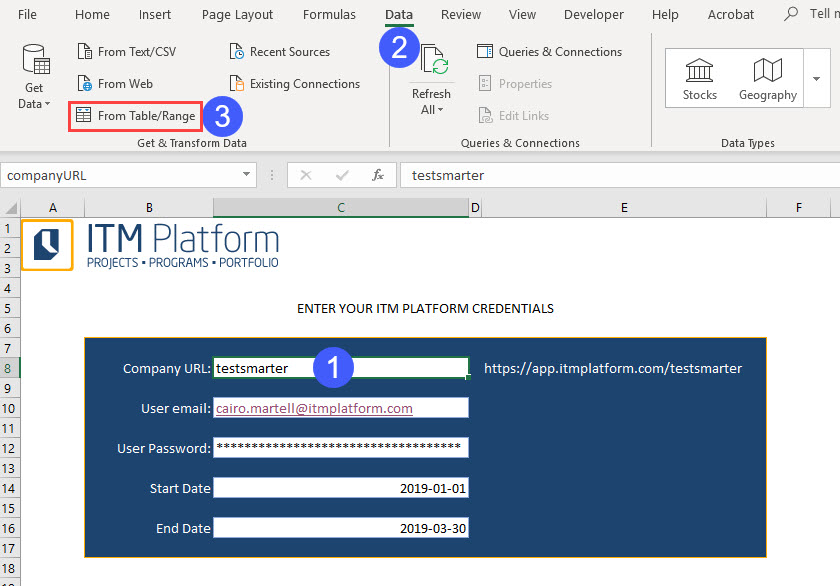
2. Perform a query from a table or range
For each field of data (each cell) entry, we create a query “from a table or range” in the “Data” menu
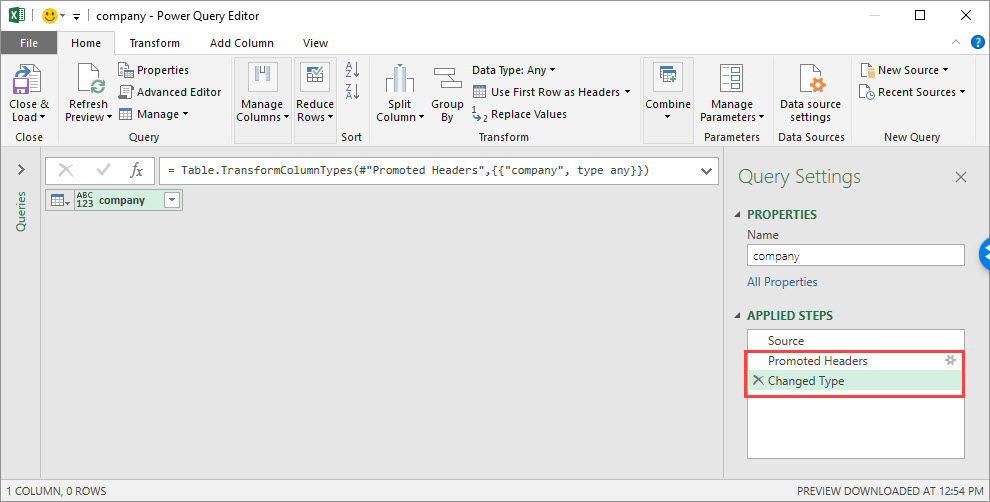
3. Remove the two last steps
When you create the query, a pop-up window will display three steps created automatically. We will remove the last two
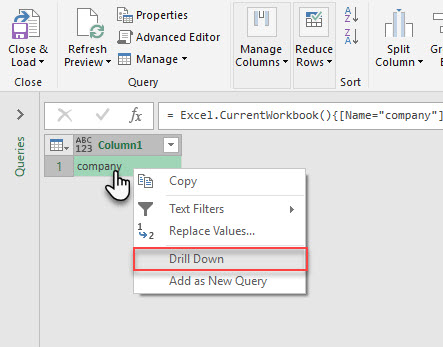
4. Right click on the value of the field and select “Drill down”
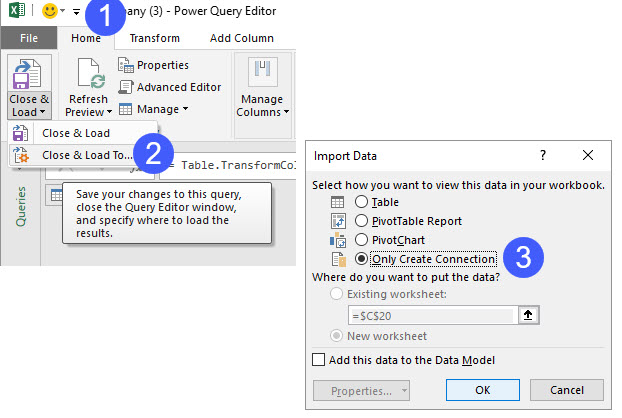
5. Close and load as “only connection”
Go to Home and select “Close and load to…” as “only create connection”.
This will create a parameter (“companyURL“) that we can use in queries to the ITM Platform API, simply using its name.
6. Use the parameters
Now it’s just a matter of using the parameters in queries, linking these with the text t. In this example, we are using the companyURL, email and password parameters to obtain the connection token.
myToken = Json.Document(Web.Contents("https://api.itmplatform.com/" & companyURL & "/login/" & email & "/" & password))
Important note: as it happens in articles of previous examples, you have to select “always ignore privacy levels” in Excel’s options section.