AI-Generated Tasks

AI-Generated Tasks


Introduction

Whether directly with a prompt or through a meeting transcript, ITM Platform can generate a task list to help you easily create work plans.


How to Use the AI-Generated Tasks Feature

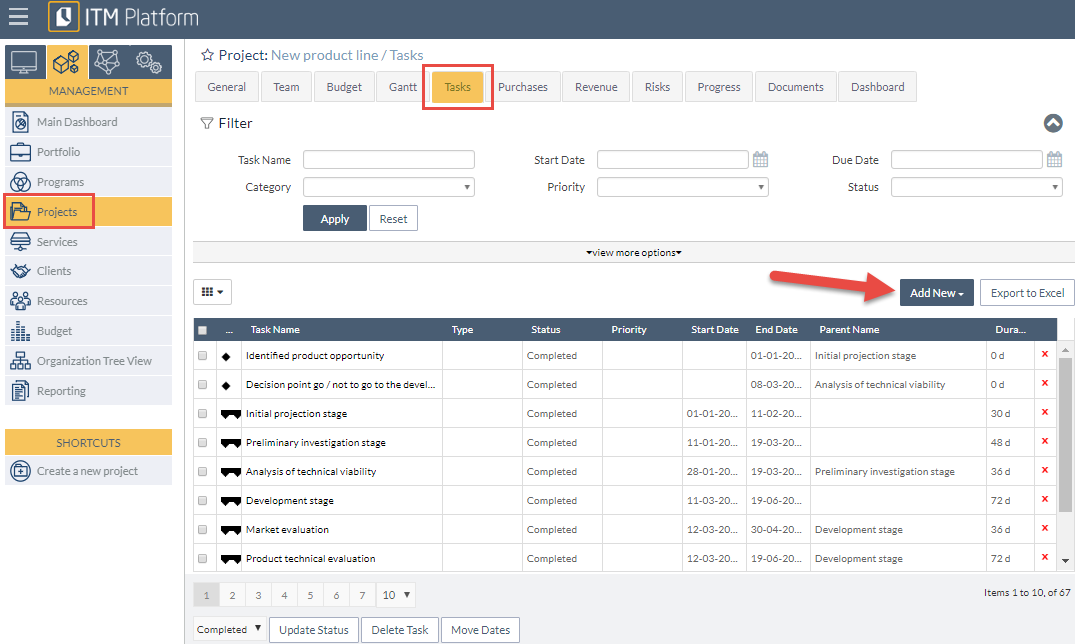
  1. From any section of the project where you can create tasks, select “Generate an action plan based on a prompt.” A magic wand symbol usually represents this option. For example:
    Task List
    Agile Panel
    Gantt
    ES panel agil
    Gantt
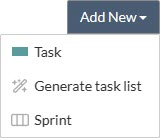
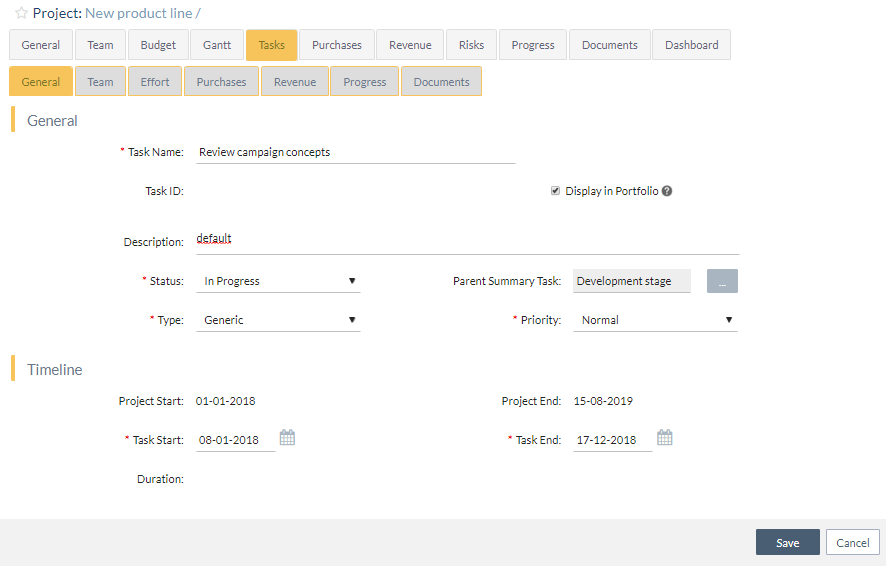
  2. You will see a text box where you can type or paste content on which you want the system to generate a task list. You can also retrieve the last prompt.
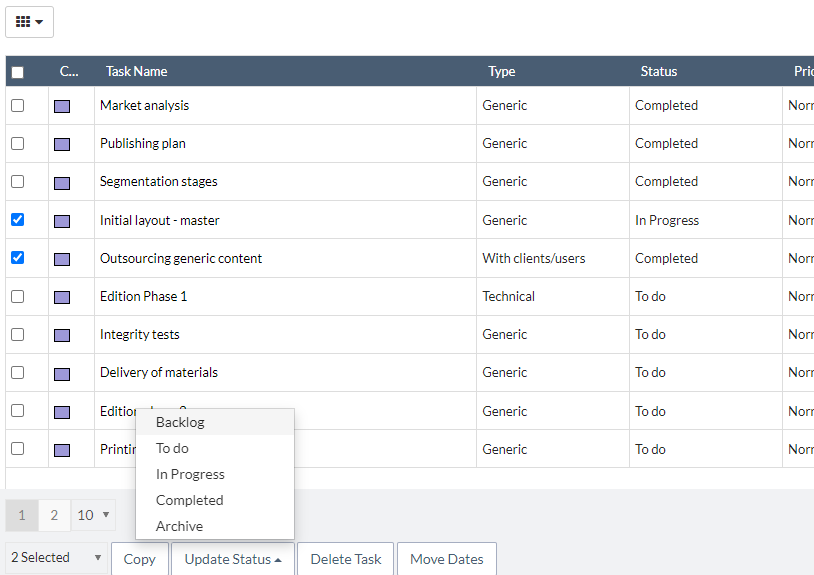
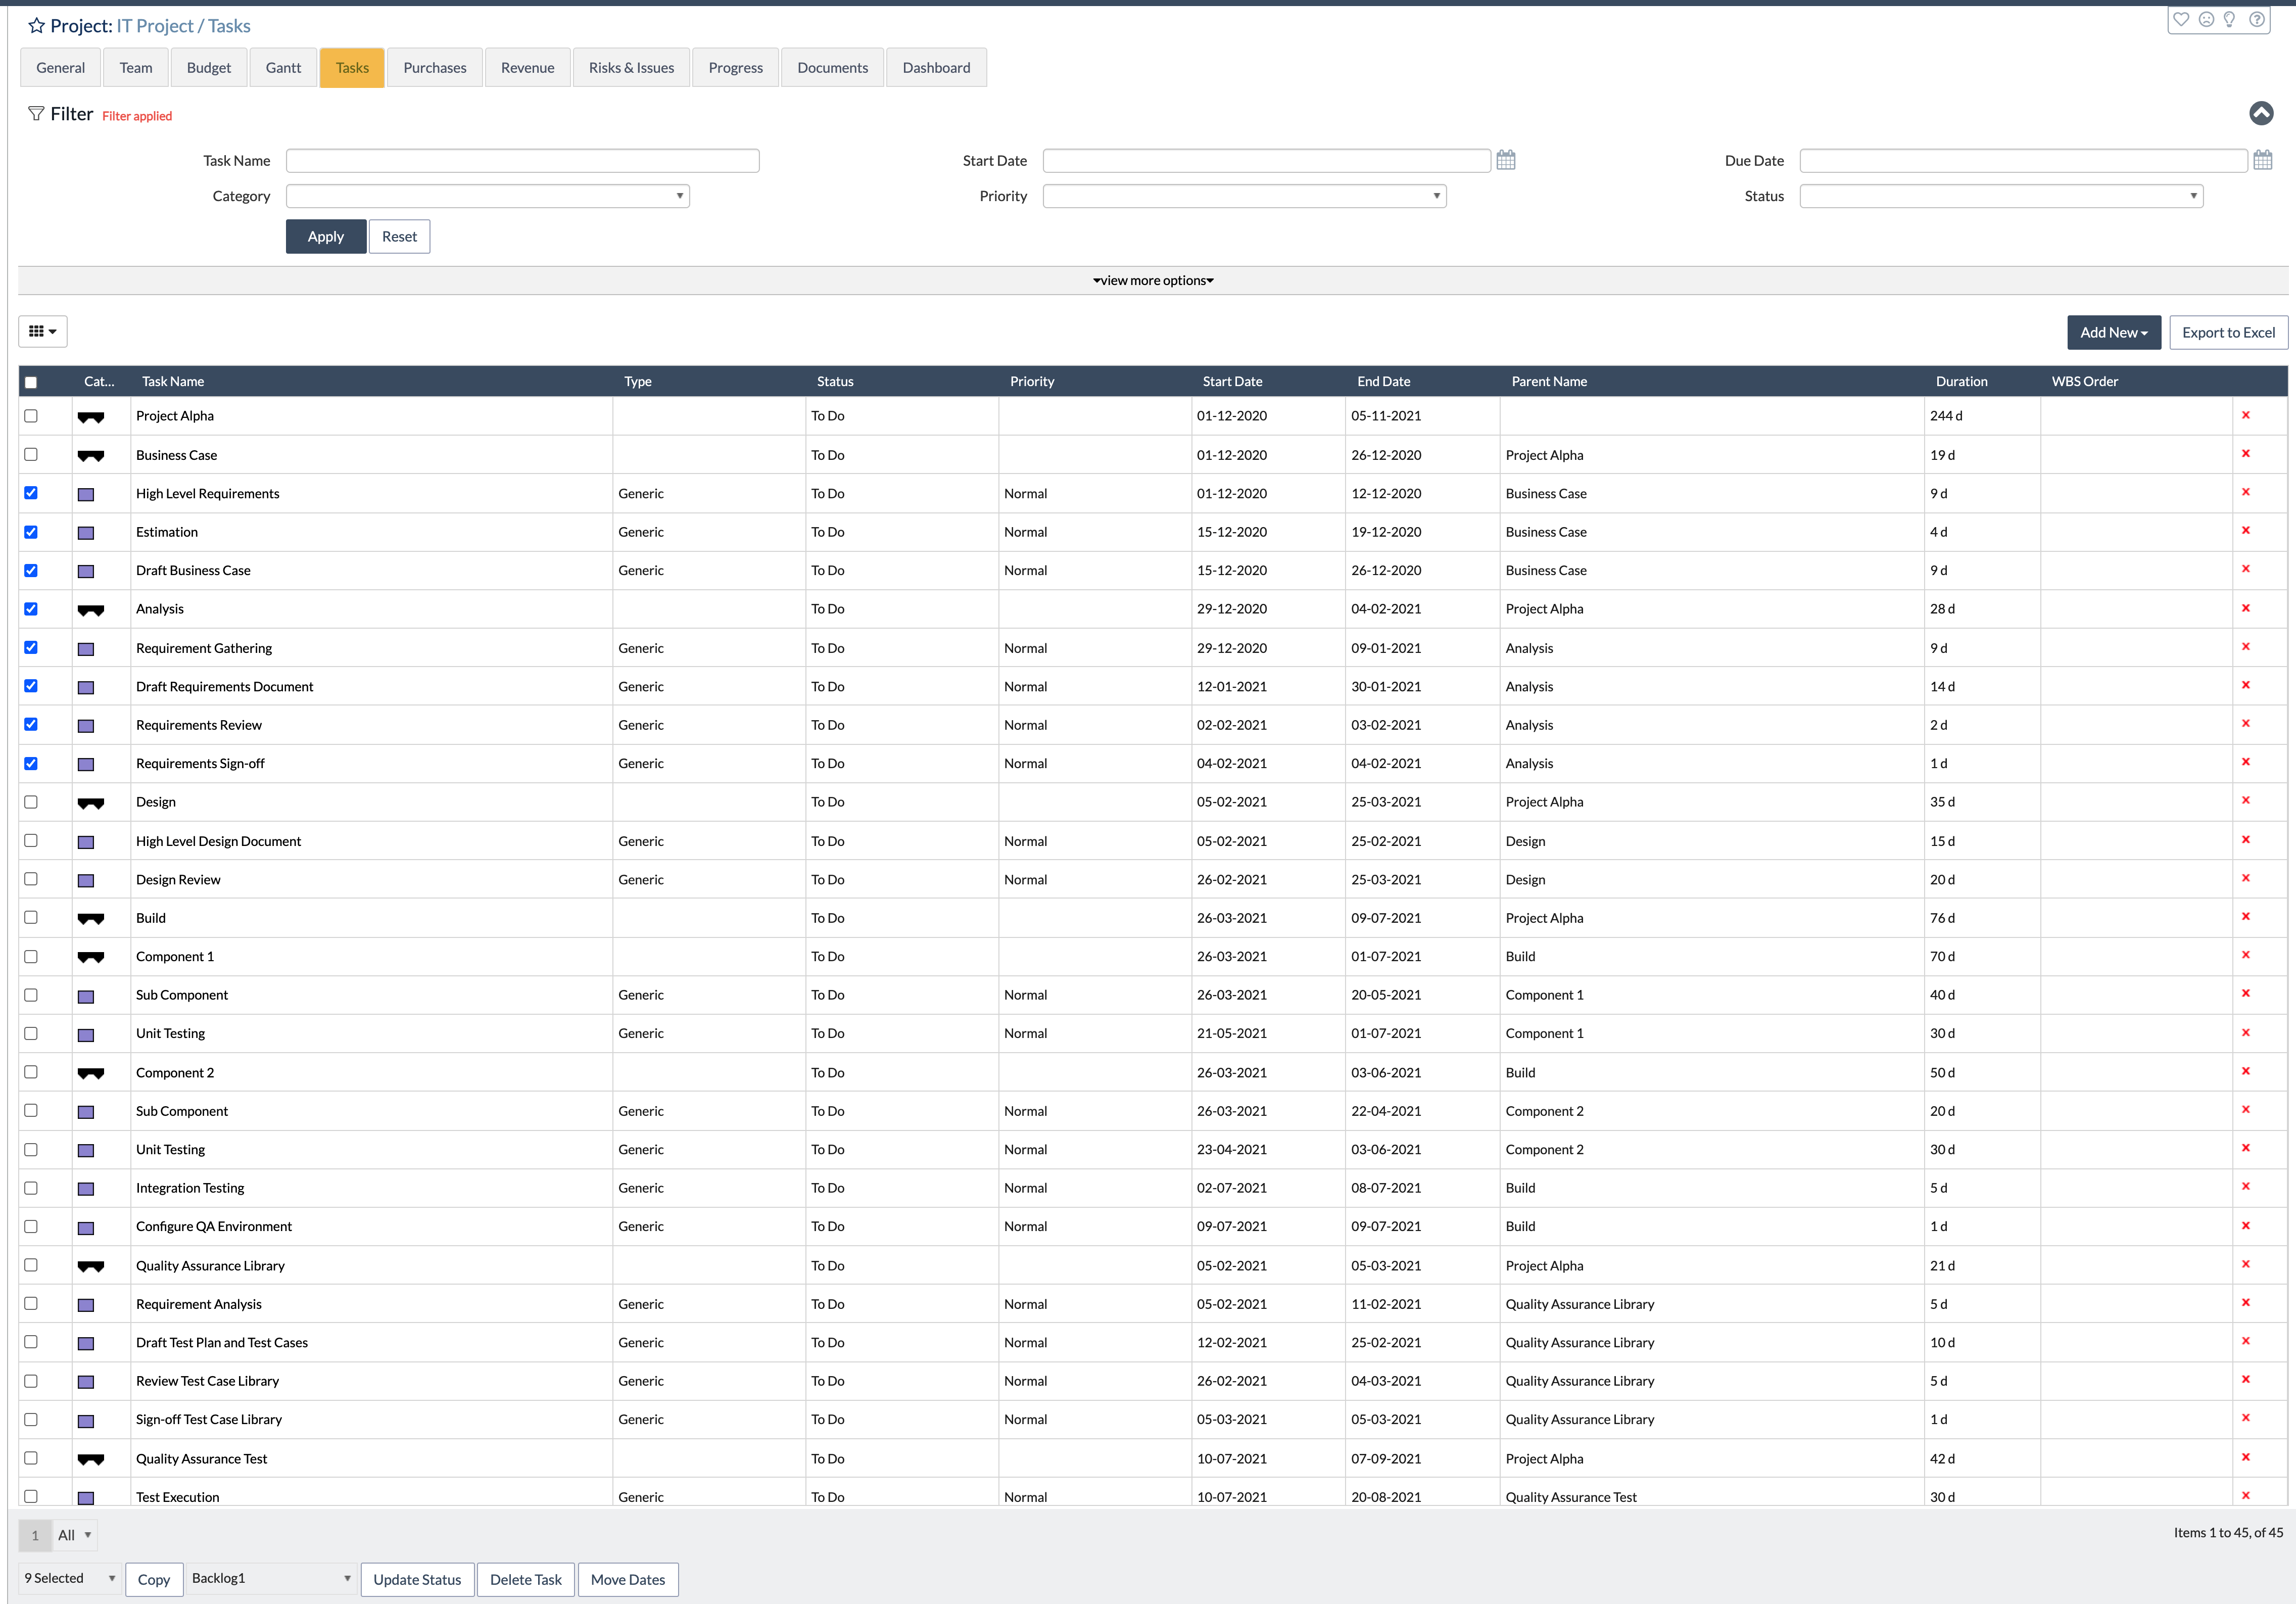
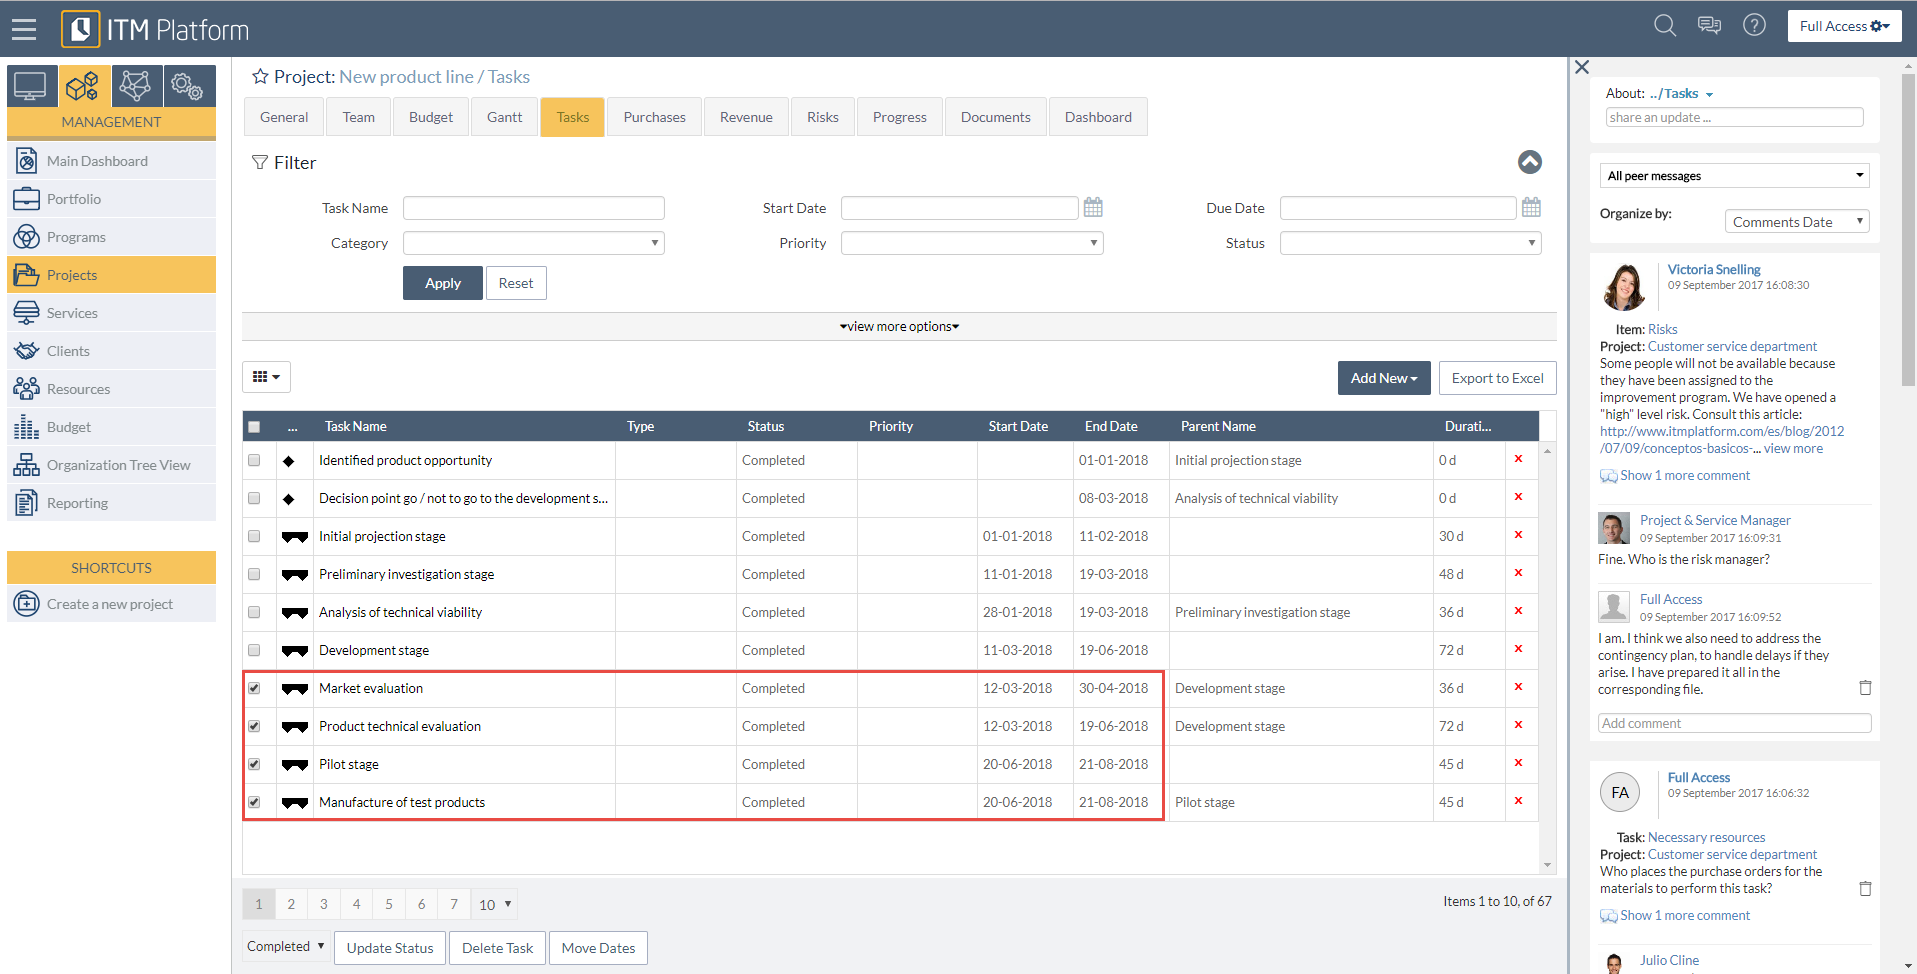
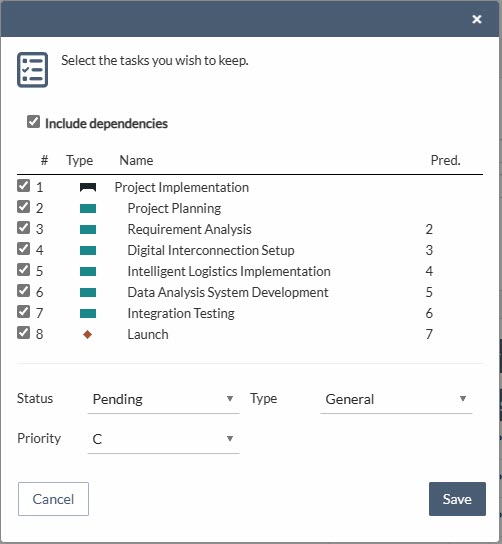
  3. You can select the generated tasks that interest you and record them. There are some differences depending on the type of project or where you have generated the list:
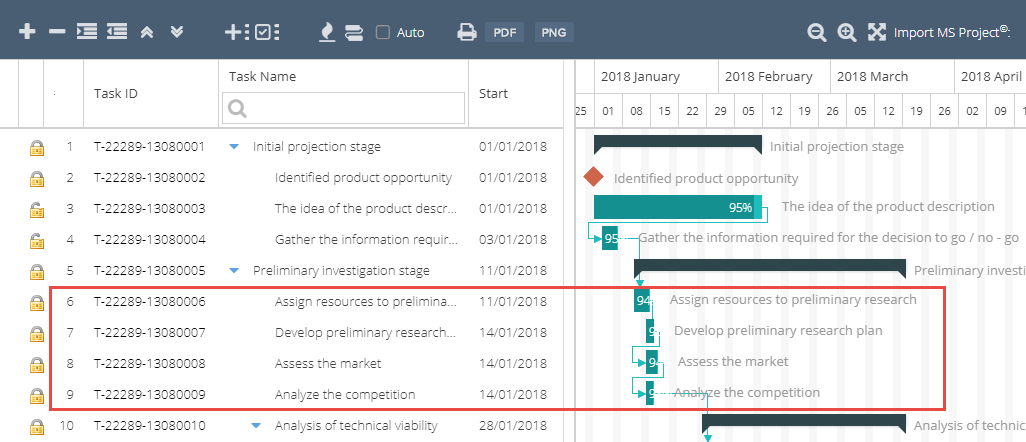
    • From the Gantt, tasks and their dependencies will appear directly on it, giving you the opportunity to modify what you need before recording.
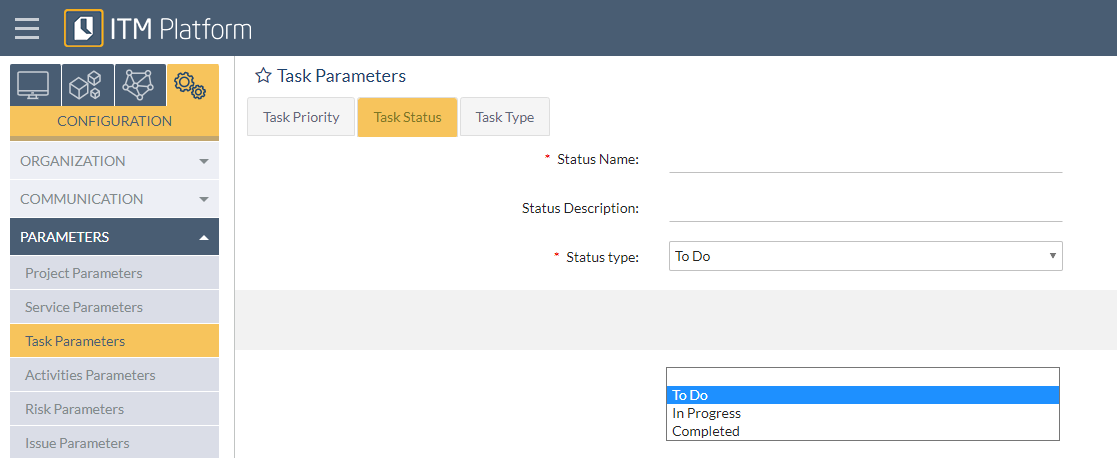
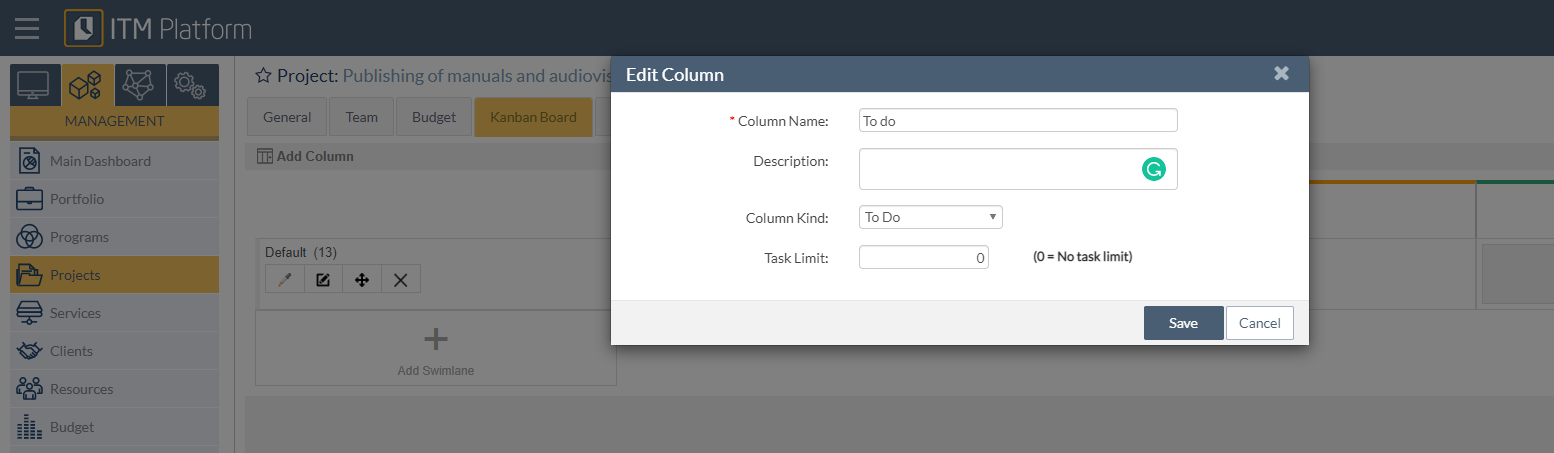
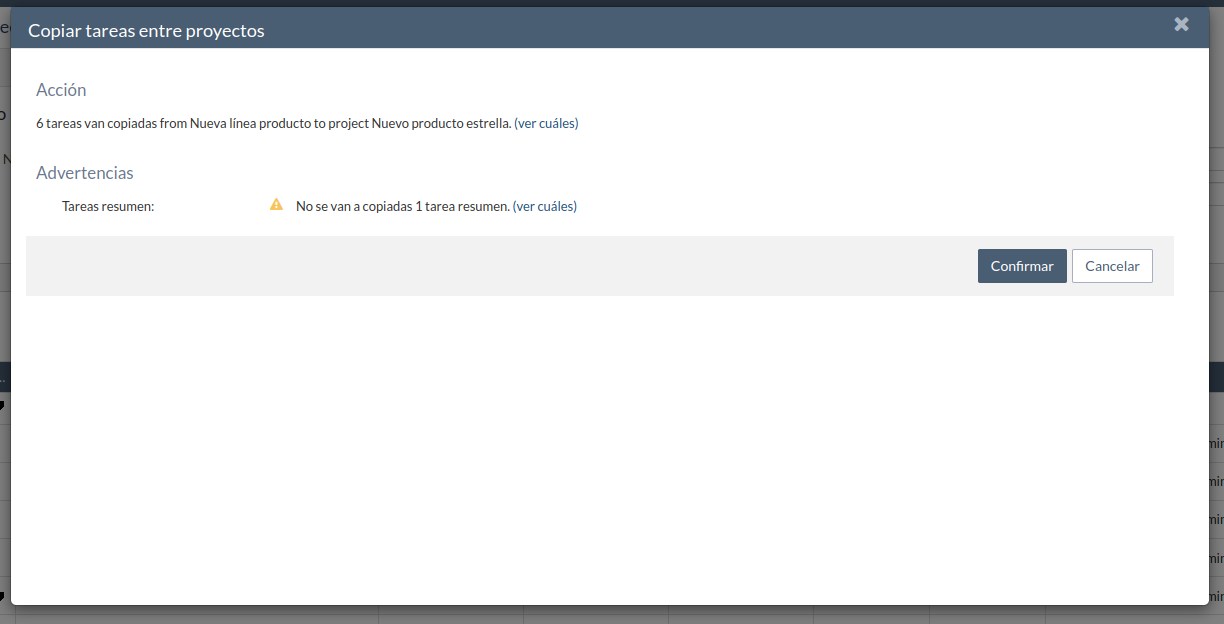
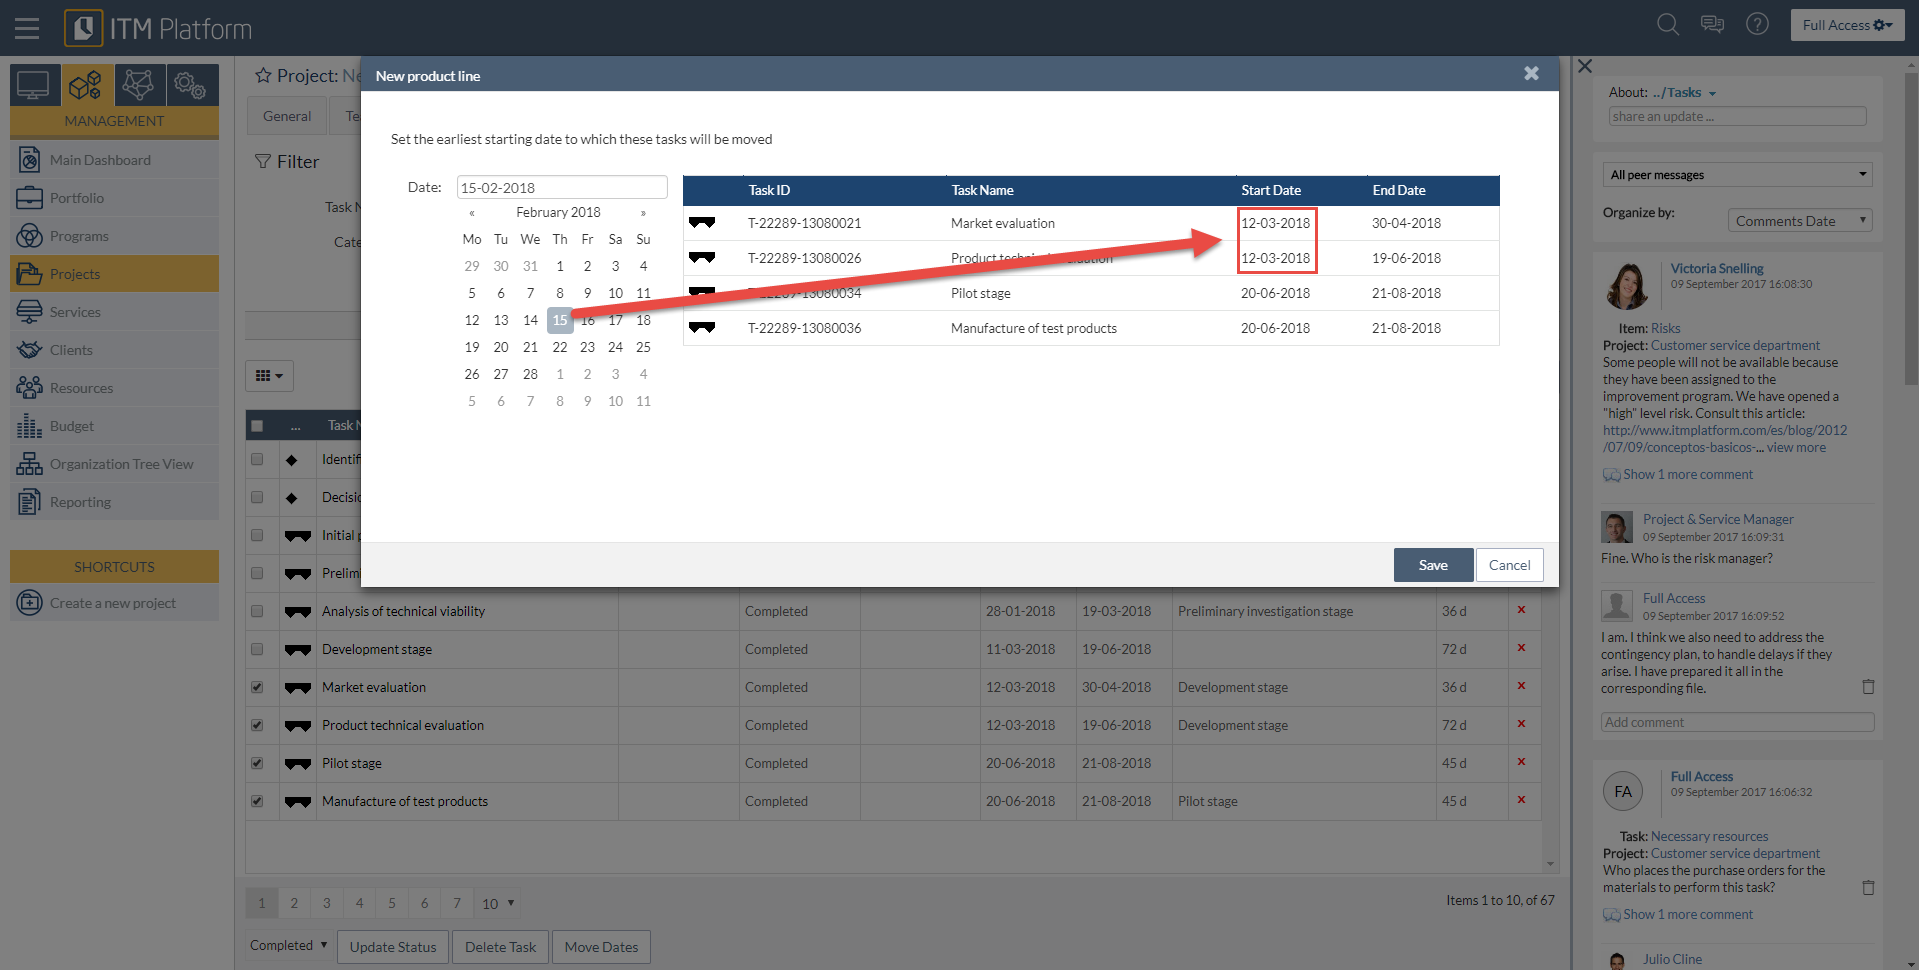
    • From the task list and the agile panel: a dialog box will be offered to select the tasks you want to include. Depending on whether it is an agile or predictive (waterfall) project, dependencies and other features dependent on the project management model will be shown.
      EN Task selection

How It Works in the Background

The AI task generation function works by:

  • Capturing, processing, and sending the prompt to the AI model along with instructions to generate a work plan.
  • Data processing: The AI data is processed by the ITM Platform, adding information that does not require AI, such as dates, dependencies, or basic characteristics of the tasks.
  • Approval and saving: The user can review and accept this plan before recording.


Security and Data Handling

  • Third-party AI systems: We use advanced AI systems like Azure AI and OpenAI for processing.
  • Data anonymity: Identifiable company data or project names are not shared. Ensure the prompt does not include compromising information, as this content is beyond ITM Platform’s control.
  • Encryption and privacy: All communications are encrypted. There is no data retention in third-party services, nor is your data used to train other models.
  • Supervision and labeling of sensitive content. If offensive or inappropriate material is identified, the provided content is carefully examined and marked.

The AI task generation feature on ITM Platform facilitates the creation of work plans and can synthesize a large amount of information into clear and concise action points.

Task Statuses: Customization and Implementation

Task Statuses: Customization and Implementation


On ITM Platform, tasks of all project types can have different statuses. All statuses are based on five basic statuses: Backlog, Pending, In Progress, Completed, and Archive. Three of them (Pending, In Progress, and Completed) are operational, and only on them is it possible to create customizable statuses.


Customizable Task Statuses:

ITM Platform offers three operational states as standard, which are based on the Pending, In Progress, and Completed base states. You can change these or create new ones so that task states reflect your processes.

Task statuses can be created and customized for both waterfall and agile projects. In the following sections, we explain how.


Non-customizable Task Statuses:

There are two complementary task statuses: Backlog and Archive. You cannot create statuses based on Backlog and Archive.

They are also present in Agile and Waterfall projects.


Implementation of Task Statuses in Waterfall Projects:

For predictive (Waterfall or Gantt) projects, task statuses are defined at the organization level and always based on the operational baseline statuses (Pending, In Progress, and Completed). To create new statuses or alter existing ones, you will need a Full Access license. Go to SETTINGS > PARAMETERS > Task parameters > Task status.

Backlog and Archive task statuses are always visible in the project Gantt so that summary tasks and calculated Progress are not affected. 


Implementation of Task Statuses in Agile Projects:

In agile projects, task states are defined at the project level (by columns). As in waterfall projects, task statuses are based on operational statuses.

To add or change columns, go to the agile project dashboard and select “Edit board layout”:

Note that tasks whose statuses are Backlog or Archive will not appear in the Dashboard but will be visible from the task list if desired.


Bulk status change from the task list:

To change the status of one or more tasks to Backlog or Archive from the task list:

  1. Select the tasks
  2. Click on Update status
  3. Choose the new task status

Note that the Backlog and Archive task statuses appear first and last in the list of task statuses, while in the middle will appear the base task statuses and those task statuses created from them.

Mass copying tasks

Introduction

ITM Platform allows you to perform operations on a group of tasks of a project by navigating to the Tasks section and selecting the tasks you require. The selection is made by ticking the tick box to the left of each task.

As soon as you start making your selection, you can see the number of tasks you selected at the bottom of the list, and four options are enabled.

  • Copy: Copies the selected tasks to another project, as explained in more detail in the next section. Apart from copying tasks, you can choose to include the task members, purchases, revenues, risks, or issues related to the tasks you are copying.
  • Update Status: Select a status from the dropdown list to the left of this option and click on the button “Update Status” to change the status of all selected tasks
  • Delete Task: Deletes all selected tasks. Before deleting the tasks, ITM Platform will ask for your confirmation.

  • Move Dates: This allows to move the start and end date of all selected tasks. The date you select applies to the start date of the earliest of the selected tasks, and the rest of the tasks will be moved within the same number of days.

Copying tasks


Clicking the option “Copy” opens a pop-up showing how many tasks will be copied.

Clicking on the option “see which,” you get a list of the selected tasks.

The pop-up allows setting several options that will be applied when copying the list of selected tasks.


  • Destination Project: Select the project you want to copy the selected tasks to from a dropdown list of all available projects. By writing in the field, you can filter the list.
  • Dates: The dates of all tasks will automatically be adapted based on the difference in start dates between the origin and destination project.
  • Status: Select the status you want to apply to all tasks copied to the destination project or select “Keep Current” if you want to keep the status unchanged.
  • Priority: Select the priority you want to apply to all tasks copied to the destination project or select “Keep Current” if you want to keep the priority unchanged.
  • Type: Select the type you want to apply to all tasks copied to the destination project or select “Keep Current” if you want to keep the type unchanged.
  • Include descriptions: Select this option to include the task descriptions in the copied tasks.
  • Include dependencies: Select this option to include the relations between predecessor tasks and the copied tasks. Relations between predecessor tasks and copied tasks can only be copied if the predecessor task and the dependent task are included in the list of selected tasks.
  • Include documents: Select this option if you want to include the documents of the copied tasks.
  • Include custom field values: Select this option if you want to include the custom field values of the copied tasks.
  • Include task members: Select this option if you want to include the task members of the copied tasks, as explained in more detail in the below section “Include task members.”
  • Include purchases: Select this option if you want to include the purchases that depend on the selected tasks, as explained in more detail in the “Include purchases” below.
  • Include revenues: Select this option if you want to include the revenues that depend on the selected tasks, as explained in more detail in the “Include revenues” section below.
  • Include risks: Select this option if you want to include the risks that depend on the selected tasks, as explained in more detail in the “Include risks” section below.
  • Include issues: Select this option if you want to include the issues that depend on the selected tasks, as explained in more detail in the “Include issues” below.

Click ” Next ” to proceed once you are happy with the selected options. Before copying the tasks, ITM Platform gives you a summary of the tasks to be copied and a list of warnings, if applicable.

Copiar tareas entre proyectos

The warnings that the pop-up screen can show are:

  • Summary Tasks: ITM Platform will show a warning when you are copying tasks of which the summary tasks are not included in the list of selected tasks. Clicking on “see which,” you can see which Summary Tasks are missing. If you choose to proceed, the tasks will be copied, but without being the child of the summary task.

Advertencia tareas resumen


  • Dependencies (Predecessor): This warning will be shown if one or more predecessor tasks are not included in the list of selected tasks, while their dependent tasks are in the list of tasks to be copied. The warning will only be shown if you include the task dependencies.

When you receive warnings on the summary screen, you can either choose to cancel and include additional tasks in the selection to fix these issues or choose to proceed. Once you confirm, the copied tasks may take up to a minute to appear in the destination project.

Include task members

Select this option if you want to include the assigned task members on the tasks to be copied. A section with an additional option is opened when you select the option.

  • Assign team members to the destination project. If you select this option, team members are automatically added to the destination project if they are task members on one or more copied tasks. If the option is unselected, any task member that is not a team member on the destination project will not be included.

Include purchase

Select this option if you want to include the purchases that depend on the tasks to be copied. When you select the option, a section with additional options is opened.

  • Status: Select the status you want to apply to the purchases copied to the destination project or select “Keep Current” if you want to keep the status unchanged.

  • Dates: The due dates of all purchases will automatically be adapted based on the difference in start dates between the origin and destination project.

  • Include descriptions: Select this option to include the descriptions in the copied purchases.

  • Include provider: Select this option if you want to include the provider in the copied purchases.

  • Include documents: Select this option if you want to include the documents of the copied purchases.

  • Include projected amount: Select this option if you want to include the projected amount of the copied purchases. Leave the field on the right empty if you want to copy the amounts of the origin project or set a percentage to multiply the projected amounts with.

  • Include purchase number: Select this option to include the purchase number of the copied purchases.

  • Include actual amount: Select this option to include the actual amount of the copied purchases. Leave the field on the right empty if you want to copy the amounts of the origin project or set a percentage to multiply the actual amounts with.

  • Include custom field values: Select this option if you want to include the custom field values of the copied purchases.

Include revenues

Select this option if you want to include the revenues that depend on the tasks to be copied. When you select the option, a section with additional options is opened.


  • Status: Select the status you want to apply to the revenues copied to the destination project or select “Keep Current” if you want to keep the status unchanged.

  • Dates: The due dates of all revenues will automatically be adapted based on the difference in start dates between the origin and destination project.

  • Include descriptions: Select this option to include the descriptions in the copied revenues.

  • Include documents: Select this option if you want to include the documents of the copied revenues.

  • Include projected amount: Select this option if you want to include the projected amount of the copied revenues. Leave the field on the right empty if you want to copy the amounts of the origin project or set a percentage to multiply the projected amounts with.

  • Include revenue no.: Select this option if you want to include the revenue number of the copied revenues.

  • Include actual amount: Select this option if you want to include the actual amount of the copied revenues. Leave the field on the right empty if you want to copy the amounts of the origin project or set a percentage to multiply the actual amounts with.

  • Include custom field values: Select this option if you want to include the custom field values of the copied revenues.


Include risks

Select this option to include the risks related to the tasks to be copied. When you select the option, a section with additional options is opened.


  • Status: Select the status you want to apply to the risks copied to the destination project or select “Keep Current” if you want to keep the status unchanged.

  • Type: Select the type you want to apply to the risks copied to the destination project or select “Keep Current” if you want to keep the type unchanged.

  • Impact: Select the impact you want to apply to the risks copied to the destination project or select “Keep Current” if you want to keep the impact unchanged.

  • Probability: Select the probability you want to apply to the risks copied to the destination project or select “Keep Current” if you want to keep the probability unchanged.

  • Include documents: Select this option if you want to include the documents of the copied risks.

  • Include descriptions: Select this option to include the descriptions in the copied risks.

  • Include total cost: Select this option if you want to include the total cost of each of the copied risks. Leave the field on the right empty if you want to copy the amount or setting of the origin project or set a percentage to multiply the total cost with.

  • Include total schedule variation: Select this option if you want to include the total schedule variation of each of the copied risks. Leave the field on the right empty if you want to copy the number or set of the origin project or set a percentage to multiply the total schedule variation with.

  • Include change in scope: Select this option if you want to include the change in scope of each of the copied risks.

  • Include mitigation plan: Select this option if you want to include the mitigation plan of each of the copied risks.

  • Include contingency plan: Select this option if you want to include the contingency plan of each of the copied risks.

  • Include the total cost of risk management: Select this option if you want to include each of the copied risks’ total cost of risk management. Leave the field on the right empty if you want to copy the amount or setting of the origin project or set a percentage to multiply the total cost of risk management with.

  • Include total hours of risk management: Select this option if you want to include the total hours of risk management of each of the copied risks. Leave the field on the right empty if you want to copy the number or set of the origin project or set a percentage to multiply the total hours of risk management with.

  • Include risk manager: Select this option to include the assigned risk manager on the risks to be copied. A section with an additional option is opened when you select the option.


    • Assign risk manager to destination project: If you select this option, team members are automatically added to the project if they are risk managers on one or more of the copied risks. If the option is unselected, any risk manager that is not a team member on the destination project will not be included.

  • Include custom field values: Select this option if you want to include the custom field values of the copied risks.


    Include issues

    Select this option if you want to include the issues related to the tasks to be copied. When you select the option, a section with additional options is opened.


      • Status: Select the status you want to apply to the issues copied to the destination project or select “Keep Current” if you want to keep the status unchanged.

      • Type: Select the type you want to apply to the issues copied to the destination project or select “Keep Current” if you want to keep the type unchanged.

      • Include documents: Select this option if you want to include the documents of the copied issues.

      • Include descriptions: Select this option to include the descriptions in the copied issues.

      • Include change in project cost: Select this option if you want to include the change in project cost of each of the copied issues. Leave the field on the right empty if you want to copy the original project’s amount or setting or set a percentage to multiply the change in project cost with.

      • Include change in project schedule: Select this option if you want to include the change in each of the copied issues. Leave the field on the right empty if you want to copy the number or set of the origin project or set a percentage to multiply the change in a project schedule with.

      • Include the cost of issue management: Select this option if you want to include the cost of issue management of each of the copied risks. Leave the field on the right empty if you want to copy the amount or setting of the origin project or set a percentage to multiply the cost of issue management with.

      • Include hours of issue management: Select this option if you want to include the hours of issue management of each copied issue. Leave the field on the right empty if you want to copy the number or set of the origin project or set a percentage to multiply the hours of issue management with.

      • Include issue manager: Select this option if you want to include the assigned issue manager on the issues to be copied. A section with an additional option is opened when you select the option.


      • Assign issue manager to destination project: If you select this option, team members are automatically added to the destination project if they are an issue manager on one or more of the copied issues. If the option is unselected, any issue manager that is not a team member on the destination project, will not be included.

    • Include custom field values: Select this option if you want to include the custom field values of the copied issues.

    How to move multiple tasks and sub-tasks

    How to move multiple tasks and sub-tasks

    You can move dates for multiple tasks, summary tasks and its subordinate tasks.

    This can be done within the Tasks section of a project, selecting the tasks you want to move. These can be regular tasks, summary tasks or milestones. Anything as long as there have no reported hours on them, which would block the start date.

    To begin, select the tasks to be moved

    Then click or press the button Move Dates 

    Notice that, in this example, the selected tasks belong to a summary task; two of them have a dependency, whereas the third one has no dependencies at all. This Gantt view that provides with a clear understanding:

    Once you click on the button Move Dates, you will be asked to enter the starting date to move the selected tasks to.

    Notice that you will be setting the earliest date for the first task. All other tasks will move accordingly, respecting the distances between them, regardless whether there were dependencies or not.

    If you selected only some tasks inside a summary task, they will move and so will the start or the end date of the summary task, respecting the ones that you didn’t touch.


    Task creation

    Task creation

    ITM Platform uses two formats for task creation and management: the Gantt diagram and the task list. The projects include a task view where you can add, update and move dates simply and quickly.

    Click on the MANAGEMENT menu, Projects 1, and select the project where you wish to create the task. In the Tasks 2 section you will be able to create three basic types: milestone, summary task or normal task.

    Under the General datasheet indicate the Task Name 4 as the only required detail:

    You can add additional information which will help complete the task administration function, such as the assignment of dates, team, required efforts, attachment of documents or monitoring processes.

    In addition to creating tasks, you can also export them or move several tasks on the schedule in one single step.