En este video vamos a ver cómo configurar ITM Platform para adaptarlos a las necesidades de su organización.
Licenses and roles
Licenses and Roles
Index
Licensing Model
When you acquire an ITM Platform solution, you obtain a series of licenses which grant you access to the different functionalities during your contracted time period.
ITM Platform offers different types of licenses:
- Licenses are set with specific features.
- Licenses prices can be found at https://www.itmplatform.com/en/pricing/
- The following are the license types provided by ITM Platform:
-
- Manager licenses (see pricing)
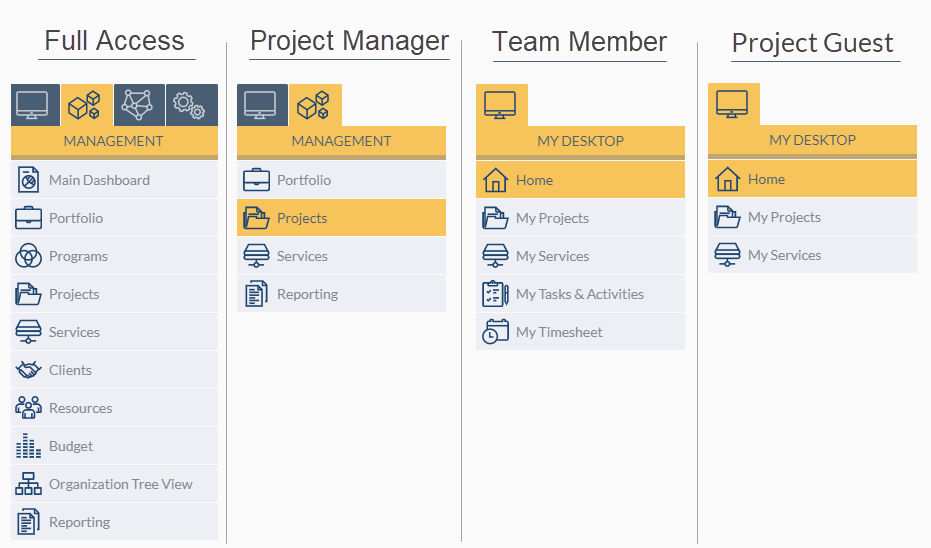
- Full Access: Users can access all features.
- Project Manager: Users can access all project features, including portfolio view narrowed down to projects, and create custom reports.
- Team Member licenses (free)
- Team Member: Users can access tasks they are assigned to, timesheets and collaboration panel.
- Task Manager: In addition, these users can add task progress reports
- Project Guest: Users can access the ¨General¨ tab of their respective project, collaboration panel, and documents they have explicitly been assigned to.
- No-login (free): Users cannot access the system but can be referred to as a resource, including estimated and accepted hours.
- Manager licenses (see pricing)
Roles
Users will have access to features of ITM Platform that are set according to their roles (see image below). Each license has one role by default. Configuring roles and creating custom roles can only be done by an ITM Platform Administrator.

Role Configuration
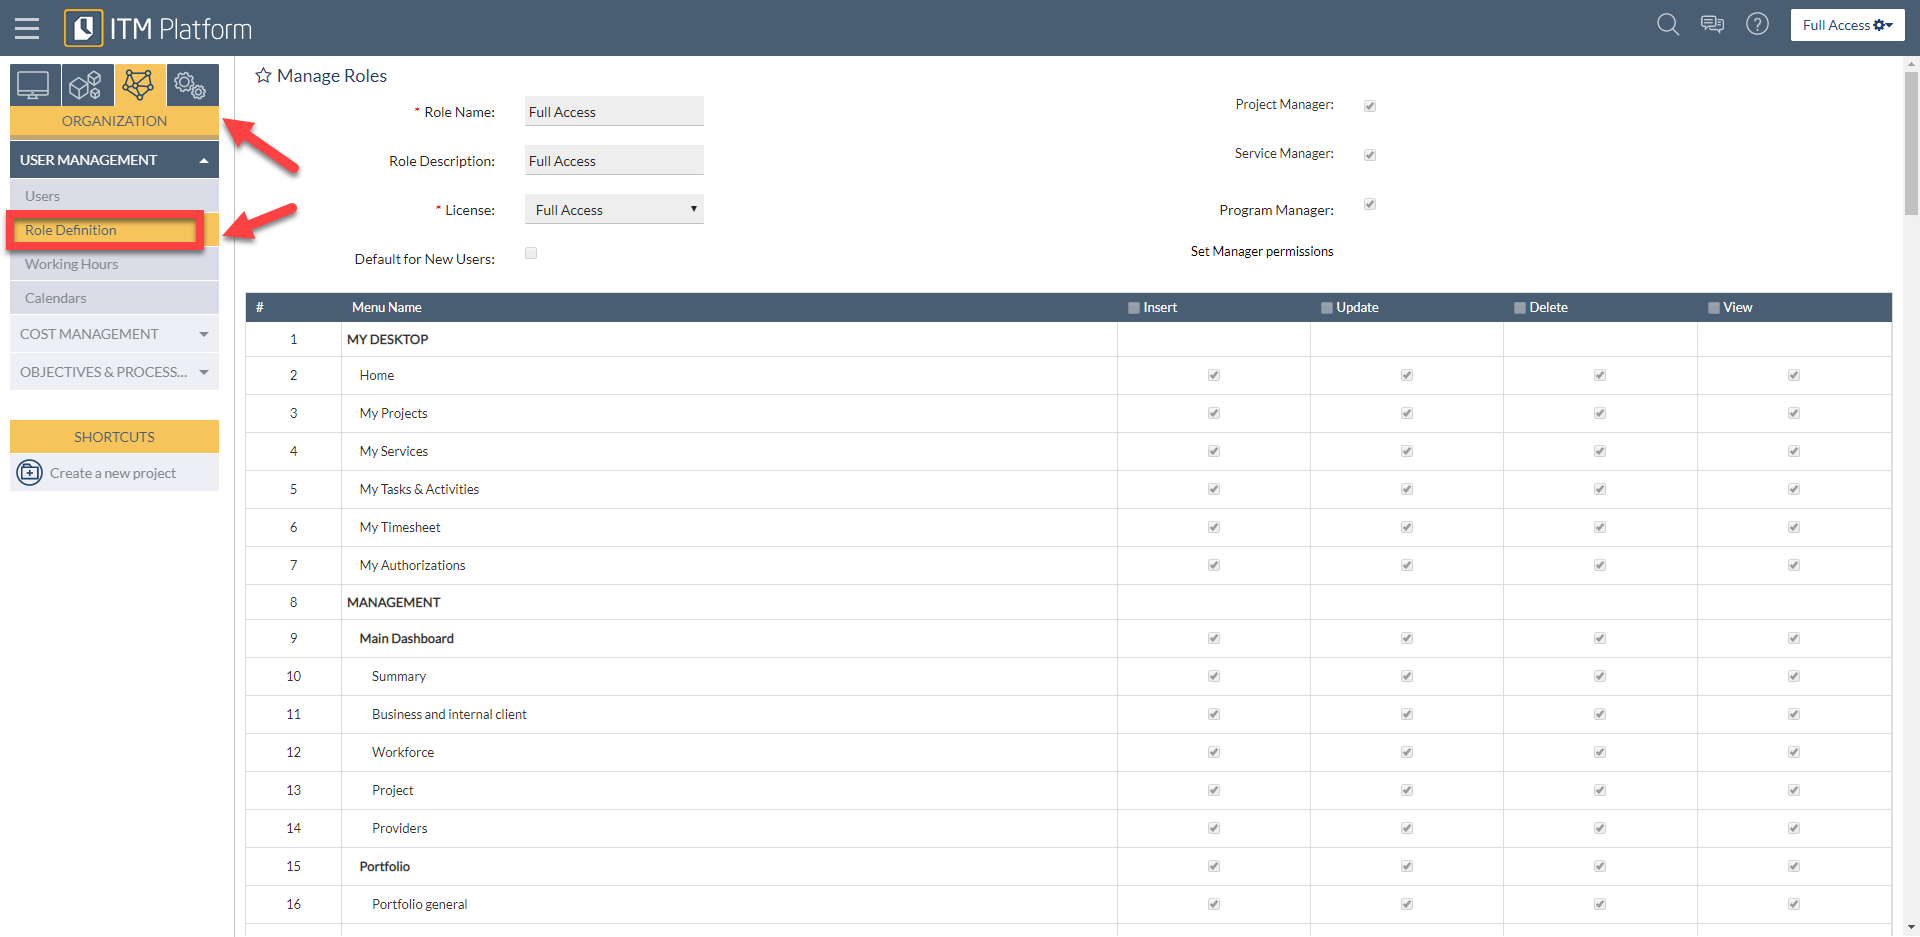
ITM Platform has a flexible mechanism for the configuration of permissions based on user roles. The licenses determine access to different functionalities and the roles are based on the licenses to configure a series of specific user permissions.To configure a role, first you must go to the ORGANIZATION tab. Next, click on “Role Definition” and add a new role.
You can assign and remove permissions for each role. There are no limits to the number of roles that can be created. A user may have more than one role assigned, in which case the permissions for each role are combined. See Create users to learn how to assign roles.
Common User Scenarios
- A user needs to access only to dashboards. This will require a custom role to be created which can only be done with a Full Access license. Unselect all other features and leave access only to the dashboard feature.
- A Project Managers is not allowed to access the “Budget” section of their projects. This will require a custom role to be created which can be done with a Full Access or Project Manager license. Proceed to remove access to the budget feature from the custom role.
- External users are allowed to access some parts of the project with no access to the timesheet. This will require a custom role to be created which can be done with a Team Member License. Proceed to remove access to the timesheet feature from the custom role.
- A procurement manager within the company needs access to the purchases feature but not to projects. This will require a custom role to be created which can be done with a Full Access license while leaving the purchases and providers features active and removing access to all other features.
- Users created in Jira have to be synchronized with ITM Platform. They will need no-login licenses to synchronize tasks and time reports.


