Standard and Custom Extensions

Standard and Custom Extensions

Extensions enhance the standard functionality of ITM Platform. 

Standard Extensions

The standard extensions available in your environment are developed by ITM Platform or a certified partner.

To access them, go to CONFIGURATION > CUSTOMIZATION > Extensions Panel.

Your ITM Platform’s environment already has standard extensions that you can install, configure, and use. Your panel may show new extensions over time. 

To install an extension, click on its icon and click on the “Install” button. Once installed, click on “Configure.”

The configuration will vary depending on the information needs of the extension. Once configured, you will need to activate the extension in all cases. 

The panel will display a green verification icon on installed extensions.

You can also disable or uninstall extensions. Note that you will lose any settings you had if you uninstall them.

Custom Extensions

With the help of custom extensions, you can create additional functions, alter standard behavior, and connect ITM Platform with other applications. 

The same extensions panel will show you the extensions that your organization has created.

They allow you to respond to events, such as updating tasks and purchase amounts or changes in project status, and responding with actions like sending an email or requesting more information from users. 

You can also program recurring actions using the scheduler and synchronize ITM Platform with your ERP, CRM, or any other application used in your organization.

To learn how to create extensions, you have the documentation and the GitHub repository where the code for the extension examples resides:

  1. Example 1: When a project is updated, send a message to a static email address.
  2. Example 2: When the actual value of a purchase is updated, send an email to a static address if the amount exceeds the purchase quote.
  3. Example 3: Send a daily email to the project manager of a specific project containing all tasks whose completion date is later than today.
  4. Example 4: Synchronize ITM Platform customers with Hubspot companies: only those that have Hubspot ownership sync_itm_platform set to true.
  5. Example 5: Allow users to enter the actual amount of revenue if < = Projected amount.

Related documentation:


Importing and updating purchases with a CSV file

Introduction

In ITM Platform, you can manage purchases within any project. Purchases can be created and processed manually. Part of this process can be done either by importing a CSV file which contains updated information in one or more purchases. This CSV file could, for example, be exported from your company’s accounting or ERP system.

The principal use of this functionality is to update existing purchases in ITM Platform once you have paid the purchase invoices. The process can also be used to add new purchases to ITM Platform. Given that the scope of this process are paid invoices, purchases will automatically be set to a status that has an actual value (such as “Paid” or “Completed”).

The import process is carried out in an individual project. If you require to update purchases on several projects, you need to repeat the process for each project.

Configuration

Before using the import process  for the first time, we need to configure the mapping of fields between the CSV file and ITM Platform. This section requires Full Access permissions and can be found under the name “Import” in “Customization” in the “Configuration” tab. The easiest is to upload an example file, of which ITM Platform will read the column names. In the section below,  you can match the CSV column name to its corresponding field in ITM Platform. For example… … All fields are optional except “Name”, “Status Date” and “Actual Amount”.

In the configuration screen above, additional options are provided:

  • Set as key field: required to select which field will be used to set the relation between each row in the CSV file and the purchase in ITM Platform. You can choose between “Name” or “Purchase No.”
  • Allow creation of new purchases: enable this option if you want to allow for the creation of new purchases from the CSV file (as described, more in detail in “Creating new Purchases”).
  • Allow grouping of multiple purchases into one purchase in ITM Platform: enable this option if you want the grouping of multiple purchases from the CSV file into one purchase in ITM Platform (as described, more in detail in ¨Grouping of purchases¨).
  • Field Separator: select which character will be used as the default field separator in the CSV file, choosing between comma (,) and semicolon (;). This setting can at each import be overwritten.
  • Actual Value: when updating or adding purchases to ITM Platform from the CSV file, these will automatically be set to a status with an actual value. If in the purchases parameters your company has multiple purchase statuses with an actual value, you can select the status to which purchases should be set in this setting.
  • Association of earlier purchases: ITM Platform tries to match the purchases from your CSV file with an existing purchase in ITM Platform. In this setting you can set what should be done if the status date of the imported purchase is earlier than the due date(s) of the matching purchase(s) in ITM Platform. The available options are to link it to the purchase in ITM Platform with the earliest date, with the latest date or create a new purchase.
  • Association of later purchases: In this setting you can set what should be done if the status date of the imported purchase is later than the due date(s) of the matching purchase(s) in ITM Platform. The available options are to link it to the purchase in ITM Platform with the earliest date, with the latest date or create a new purchase.
  • Default association: In this setting you can set what should be done if the status date of the imported purchase falls between the due dates of the matching purchases in ITM Platform. The available options are to link it to the purchase in ITM Platform with the earliest date, with the latest date, with the nearest date or create a new purchase.
  • Weak Match: The match is based on the extent to which the names of the purchases in your CSV file and ITM Platform coincide. In this setting you can determine the minimum percentage of coincidence for a match to be considered weak.
  • Strong Match: The match is based on the extent to which the names of the purchases in your CSV file and ITM Platform coincide. In this setting you can determine the minimum percentage of coincidence for a match to be considered strong.

* Please note that these settings apply to all projects and for all users in your organization.


Updating existing purchases

The process is initiated by clicking the button “Import from CSV file” within the Manage Purchases section of a project.

This opens a pop-up window where you are asked to select your CSV file. At this stage you can also change the field separator of your CSV file (comma or semicolon).

If we encounter any issues, normally related with the syntax/format of the file, you will receive an error message.

Upon clicking “Save” we will analyze your CSV file and make a proposal on how to update the purchases. In the screen below, you can make any necessary changes.

  • On the left side of the screen, you will see fields drawn from the CSV file (fields with a grey background).
  • On the right side of the screen, you will see fields corresponding to purchases in ITM Platform with their respective values. Any changes made will be applied to all fields.
  • In the center of the screen, you will findthe column “Match Type”, which shows you the type of matches that were found between the purchases from your CSV file and ITM Platform.
    • Based on the purchase names in your CSV file, a strong match means there is  a strong correlation to another purchase name found in ITM Platform.
    • Based on the purchase names in your CSV file, a weak match means there is a weak correlation to another purchase name found in ITM Platform.
    • New Entry means there is no correlation and the creation of new purchases from the CSV file is allowed therefore a  new purchase will be created.
    • No match means there is no correlation and the creation of new purchases from the CSV file is not allowed. In order to continue, you will either need to remove this purchase from the list or manually select a purchase from ITM Platform.
    • Manually selected means that you have to manually set the relation with a purchase in ITM Platform.
  • In the column “Name”, we show the purchase that will be updated in ITM Platform. For easy identification, we show its due date in brackets.
  • For existing purchases, the budget account that is shown, cannot be changed.
  • By clicking on the button next to the purchase name, a pop-up window opens and allows you to change the purchase that will be updated.
  • The fields “Description”, “Purchase No.”, “Actual Amount”, “Projected Amount” and “Status Date” can be changed manually, by simply writing in the desired field. The field “Type” can be changed by selecting an existing value from the dropdown menu.
  • You can (optionally) include a provider name or purchase type, that will be included in the purchase only if we find a matching value in ITM Platform.
  • The provider can be changed by clicking on the button next to it, and in return, opens a pop-up where you can either select an existing provider or create a new one.
  • You can also select or change the task of which a purchase depends.
  • The column “Group” displays which group a purchase pertains to. ( For more info, see  section ¨Grouping of purchases¨).
  • The x” in the final column allows the user to exclude individual purchases from the import process.

After you have reviewed the import summary and made your changes, if any, click “Confirm” to submit the changes. If there are any issues with the import, you will be notified via a pop-up screen and the changes will not be applied until you have fixed the issues.

Grouping of purchases

The grouping of purchases allows the user to group two or more purchases from the CSV  file into one corresponding purchase in ITM Platform. This means that the information from two or more purchases from the CSV file is combined and used to update one purchase in ITM Platform:

  • The status date that is set, is the one closest to the due date of the corresponding purchase in ITM Platform.
  • For the actual amount to be set in ITM Platform, we sum the amounts of the individual purchases of the CSV file.
  • To add or update the rest of the information in ITM Platform, we use the data of the purchase of the CSV file that has the status date that is closest to the due date of the purchase in ITM Platform.
  • The column “Group” lists  which group a purchase belongs to.

If ITM Platform has found a match with an existing purchase but you would rather create a new purchase in ITM Platform, you can click on the icon next to the purchase name. In the pop-up that opens, click on “Create New Purchase” and instead a new purchase will be created.


Groups are automatically proposed based on the names we find in the CSV file. If you do not agree with the proposal that ITM Platform makes, you can remove the purchase from the group. Click on the icon next to the purchase name and in the pop-up that opens, click on “Remove from Group”.

To add purchases to a group, you can manually change the linked purchase in ITM Platform. If an  ITM Platform purchase is already linked to one or more other CSV purchases, a group is created or extended.

To remove purchases from a group, you can manually change the linked purchase in ITM Platform. By doing so, it will automatically remove the purchase from its corresponding group. Please note that by clicking on “x”, the purchases are entirely excluded from the import, not just from the group.

Grouping of purchases can be done for both existing and new purchases.

Grouping of purchases can only be done if the corresponding setting in the import configuration screen has been enabled.

Creating new purchases

The process of creating new purchases is similar to that of updating existing purchases. Existing and new purchases can be mixed in one CSV file.

If ITM Platform does not detect a match between the purchase in your CSV file and ITM Platform, it proposes to create a new one. This can be identified by the value “New Entry” in the column “Match Type.” Some specific characteristics of creating new purchases are:

  • Select a budget account for each individual new purchase, by selecting it from the dropdown.
  • • ITM Platform will use the purchase name provided in the CSV file and it cannot be changed
  • You can (optionally) include a provider name or purchase type, that will be included in the purchase only if we find a matching value in ITM Platform
  • If you include multiple entries of the same purchase in your CSV file, they will automatically be grouped (if grouping is enabled)
  • You can manually select an existing purchase from ITM Platform. By doing so, an existing purchase will be updated instead of creating a new one.


Import History

Click “Import from CSV file” within the Manage Purchases section of the  project and from the dropdown menu select the option “View Import History”.

This opens a pop-up window where you see a history of all performed imports, along with  its date, number of records and user.

By clicking on a row, you open the full detail of the import.

Requirements for formatting the CSV file

Please format your CSV file by taking the following requirements into account:

  • The first row should include the column names.
  • All columns should be separated with a comma, other separators are not supported.
  • Values can optionally be put inside quotes “”. This is necessary if, for example, you need to include commas for amounts or within a name.
  • The amount and date formats should coincide with the company settings in ITM Platform.
  • The file should be encoded in Unicode UTF-8.

Using parameters in API calls from Excel cells (named ranges)

Using parameters in API calls from Excel cells (named ranges)

We have seen how to create graphs and reports calling the ITM Platform API from Power Query for Excel. With these techniques, you can extract and shape all the necessary information, but we needed to be able to customize calls to the API with parameters to – for example – send the user name and password, or filter results.

In this article we will explain how to do it through cells, or “named ranges” in Excel. The basic idea is to set up the worksheet to allow the user to enter data that will be later used by Power Query in the call to the ITM Platform API.
These are the steps:

1. Give a name to each cell

Cells (or ranges) in Excel can have a name. It will be the reference that we’ll use later in Power Query

In the example, we have named companyURL (in the picture), email, password, datein and dateout.

Tip: so the password is not visible directly in the cell, we set the custom format **;**;**;** Please note that this is not a secure way of storing passwords. Hiding and protecting the worksheet will help, but the password will still be accessible

2. Perform a query from a table or range

For each field of data (each cell) entry, we create a query “from a table or range” in the “Data” menu

3. Remove the two last steps

When you create the query, a pop-up window will display three steps created automatically. We will remove the last two

4. Right click on the value of the field and select “Drill down”

5. Close and load as “only connection”

Go to Home and select “Close and load to…” as “only create connection”.

This will create a parameter (“companyURL“) that we can use in queries to the ITM Platform API, simply using its name.

6. Use the parameters

Now it’s just a matter of using the parameters in queries, linking these with the text t. In this example, we are using the companyURL, email and password parameters to obtain the connection token.

myToken = Json.Document(Web.Contents("https://api.itmplatform.com/" & companyURL & "/login/" & email & "/" & password))


Important note: as it happens in articles of previous examples, you have to select “always ignore privacy levels” in Excel’s options section.


Is it possible to import data into ITM Platform from other project management tools?

Is it possible to import data into ITM Platform from other project management tools?

ITM Platform allows importing data from other solutions and project management tools in a simple way. Let’s see the two most significant cases:

  • Import the data from MS Project: From the “Gantt” section of each project, you can import Microsoft Project files (as well as any file that has a .mpp extension) to load the task schedule with its dates, dependencies, etc.

  • Import the data from Jira: The Jira connector allows you to import projects and other elements to ITM Platform and all the information will be updated since any changes made in any element in Jira will be automatically synchronized with ITM Platform. You can find more information by consulting this article about the Jira connector.

Creating reports and graphics with ITM Platform data in Excel: Basic access using Power Query

Creating reports and graphics with ITM Platform data in Excel: Basic access using Power Query

ITM Platform can be easily connected with external data analysis tools to produce project reports and graphs, as well as to automate the creation of custom dashboards.

This guide will demonstrate the use of Microsoft Excel 2016, which includes Power Query, to generate such outputs.

Necessary requirements to complete this tutorial:

  • Microsoft Excel,
  • An ITM Platform active environment
  • ITM Platform user with access to the information to be analyzed.

In addition, because the connection to Excel uses the ITM Platform API, it is convenient to have some familiarity with its methods and functions. All documentation is available at http://developers.itmplatform.com/.

Note: The steps described in this guide should only be performed once to configure the connection. From that point Excel will automatically update the data from ITM Platform.

 Example

  • Projects to be analyzed: All active projects on May 7, 2017
  • Objective: To compare the percentage completed versus the updated percentage completed to date reported.

Note: ITM Platform does not automatically calculate the percentage of progress in the calendar (ie, the percentage of time elapsed from the start of the project on the total estimated time for the project). However, this value can be easily calculated with the following formula:

% Calendar = (today – start date) * 100 / (end date – start date)


Step 1 – Identify the methods of ITM Platform’s API

Before you can start, you must identify the methods to be used at http://developers.itmplatform.com/. In this example, the following are used:

First method: Authentication: (get authentication)

http://developers.itmplatform.com/documentation/#authentication-1


In this example, the following access data is used for authentication:

  • User: musk@itmplatform.com
  • Password: 12345
  • Account: itmrozas

The URL is constructed with the following format:

https://api.itmplatform.com/ORGANIZATION/login/USER/PASSWORD

Therefore, in this case it will be:

https://api.itmplatform.com/itmrozas/login/elon.musk@itmplatform.com/12345

Second method: Projects (get projects) http://developers.itmplatform.com/documentation/#projects


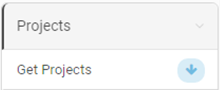
This is the method for obtaining the projects data for the complete list of projects.

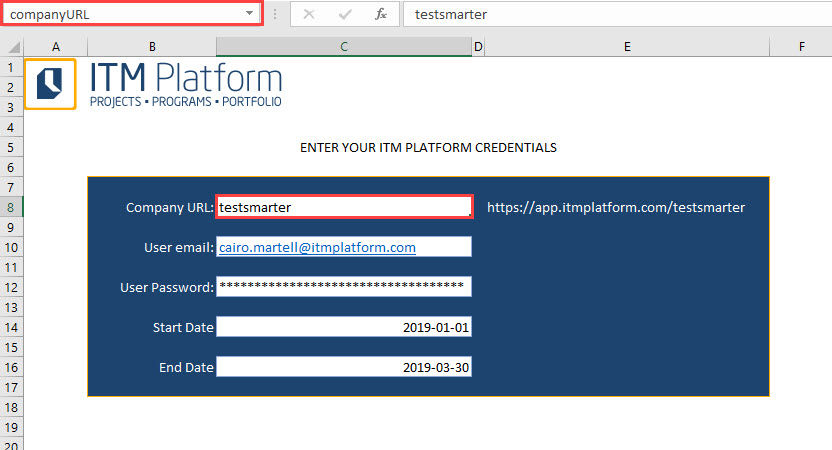
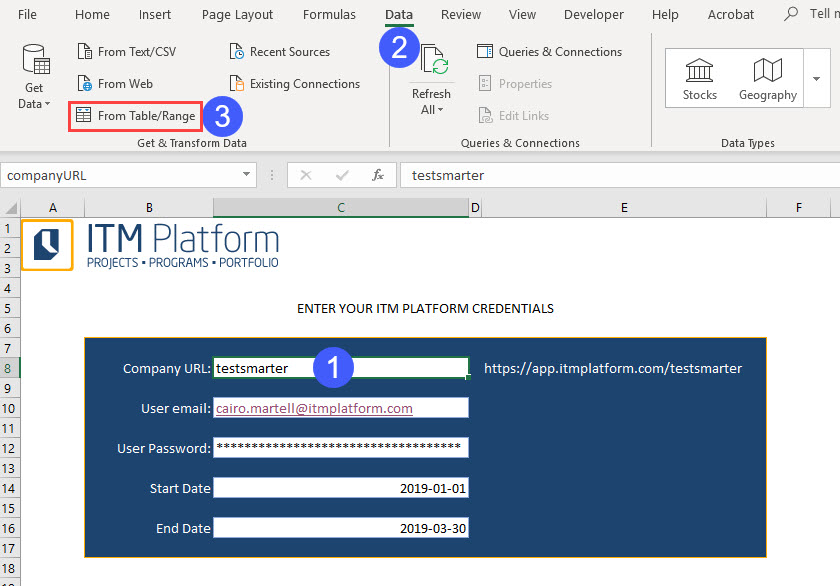
Step 2 – Create the basic query from Excel

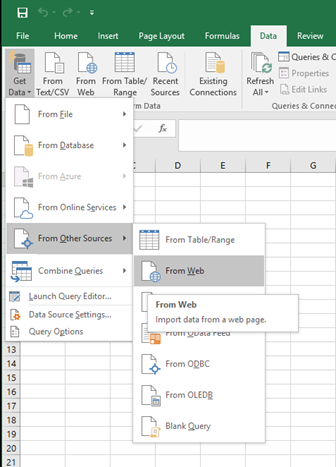
To access Power Query from Excel, simply indicate a data source. In this case, ITM Platform should be selected from the path From Other Sources> From Web.


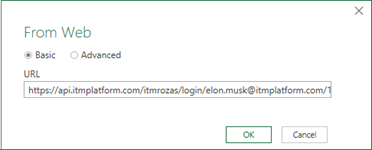
In the box, you must enter the authentication URL, which has the same format as seen above:

https://api.itmplatform.com/ORGANIZACION/login/USER/PASSWORD


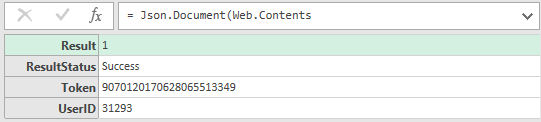
When accepting the source, Excel will provide the authentication data, which includes the authorization token.

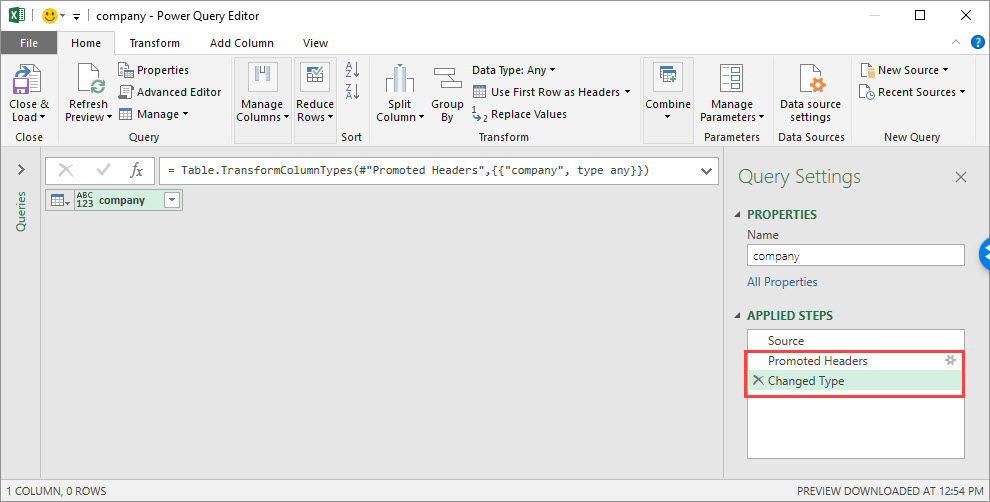
Then, from the Power Query Advanced Editor, in the Start menu, you can add the URL of the projects.

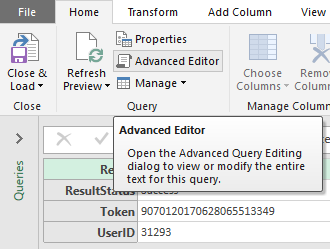
The advanced editor loads the Power Query interface and allows you to add code in the “M” or “Get & Transform” language. Although it is not necessary to know it, the basic keys will be given to be able to handle it successfully.

If all went well, the editor should display the following information:

Let

    Source =

Json.Document(Web.Contents(“https://api.itmplatform.com/itmrozas/login/elon.musk@itmplatform.com/12345”))

in

    Source

This indicates that the call to the authentication URL is stored in the Source variable. This is the essential element for Excel to be able to synchronize with ITM Platform and extract the data.

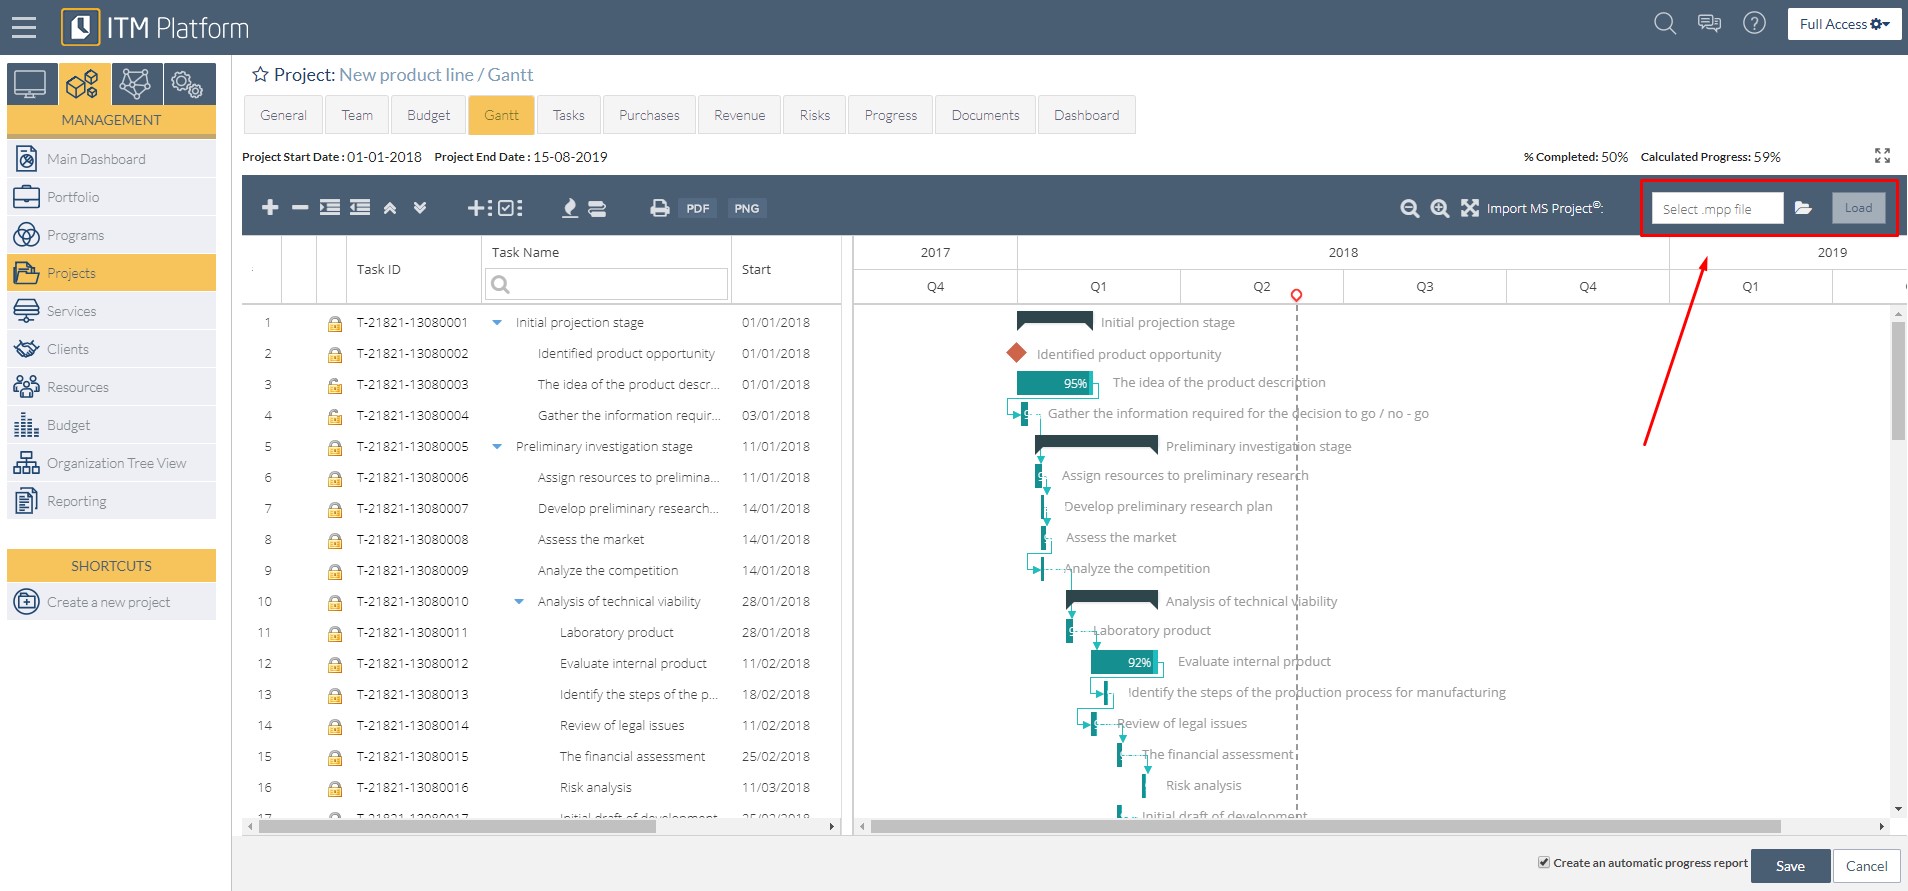
Next, you must indicate what data should be extracted. In this case, the project URL is added. In order to only see the projects that are open on May 7, the following search filter is added at the end of the URL:

?ProjectStartDate = lt: 2017-05-08T00: 00: 00Z & ProjectEndDate = gt: 2017-05-06T00: 00: 00Z

With the entire URL resulting in this:

https://api.itmplatform.com/itmrozas/projects/?ProjectStartDate=lt:2017-05-08T00:00:00Z&ProjectEndDate=gt:2017-05-06T00:00:00Z

For Power Query to be able to use authentication and query projects, you must replace the previous code with this:

Let

MyToken = Json.Document (Web.Contents (“https://api.itmplatform.com/itmrozas/login/elon.musk@itmplatform.com/12345”))

    Source = Json.Document (Web.Contents (“https://api.itmplatform.com/itmrozas/projects/?ProjectStartDate=lt:2017-05-08T00:00:00Z&ProjectEndDate=gt:2017-05-06T00:00: 00Z”, [Headers = [token = myToken [Token]])))

in

    Source

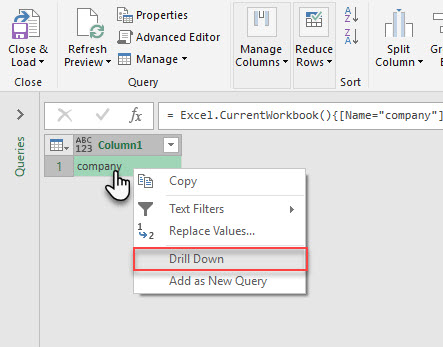
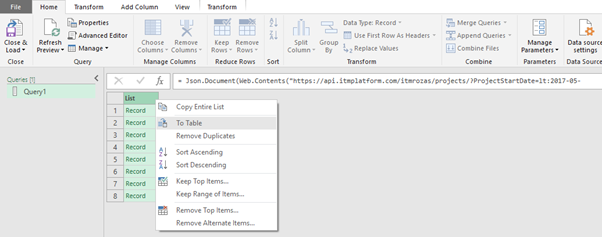
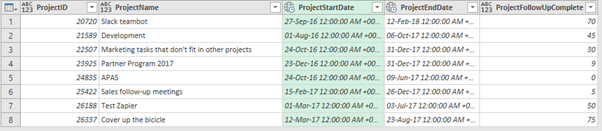
The result of the query shows data that must be transformed into a table. You can activate this option by right clicking.

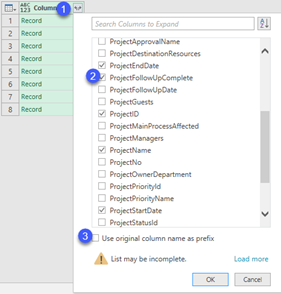
The appropriate columns are then selected.

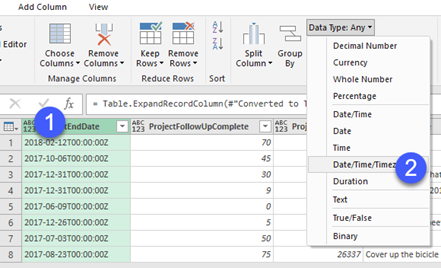
As calculations are to be performed with the date formula, it is convenient to specify date field format. To do this, select each date field and the date / time / zone option.

Finally, a list of projects that meet our conditions is produced:


Step 3 – Add the calculated data

It now becomes possible to calculate what we were looking for: the percentage of progress in the calendar. Recall that it is based on the formula:

(Today – date start) * 100 / (end date – start date)

The dialog box already provides everything you need. Just add the current date, which you get with the Power Query function:

DateTimeZone.FixedLocalNow ().

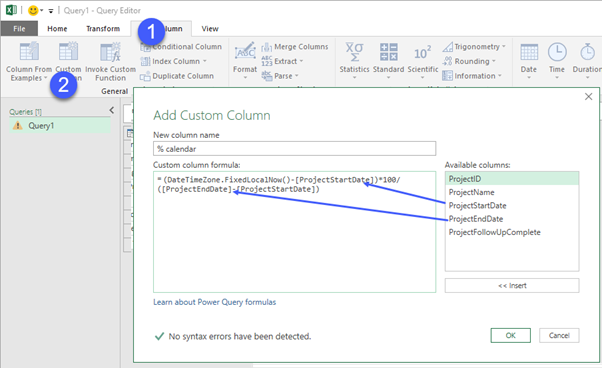
The result is a column in which the data we needed was calculated.


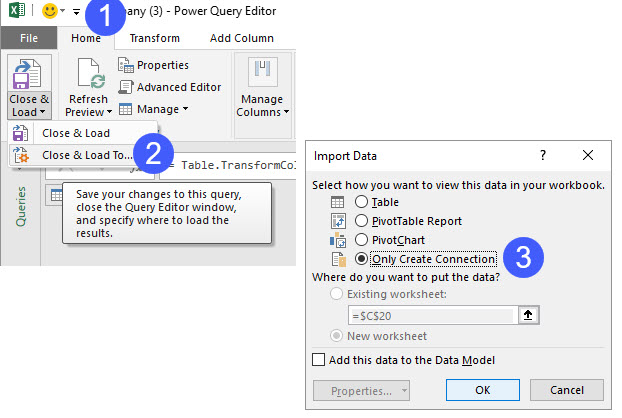
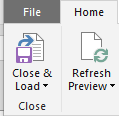
Step 4 – Save and View

Once the query outputs the calculated data, you can save and close the Power Query file.

To visualize the result, Excel allows access to both the complete table of query data and graphics.

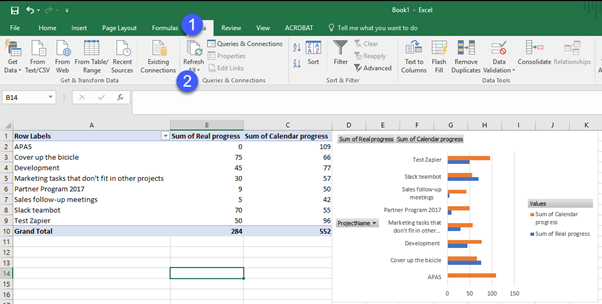
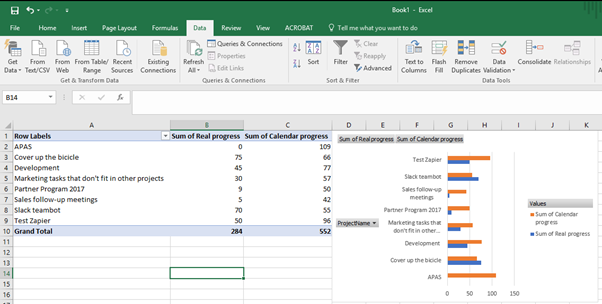
The example creates a PivotChart from the query, from the following menu options: Insert / Pivot Chart / Use an external data source. From there, the existing connections are loaded, which should show the previous query.

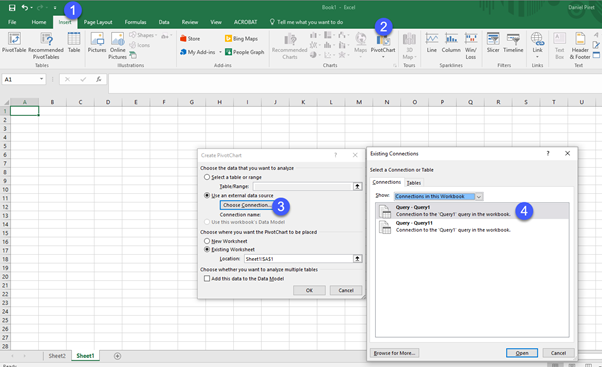
The result is a chart that compares actual progress with progress in the calendar.


Step 5 – Retrieval

To access updated and real-time data, just click on Refresh from the Data menu.