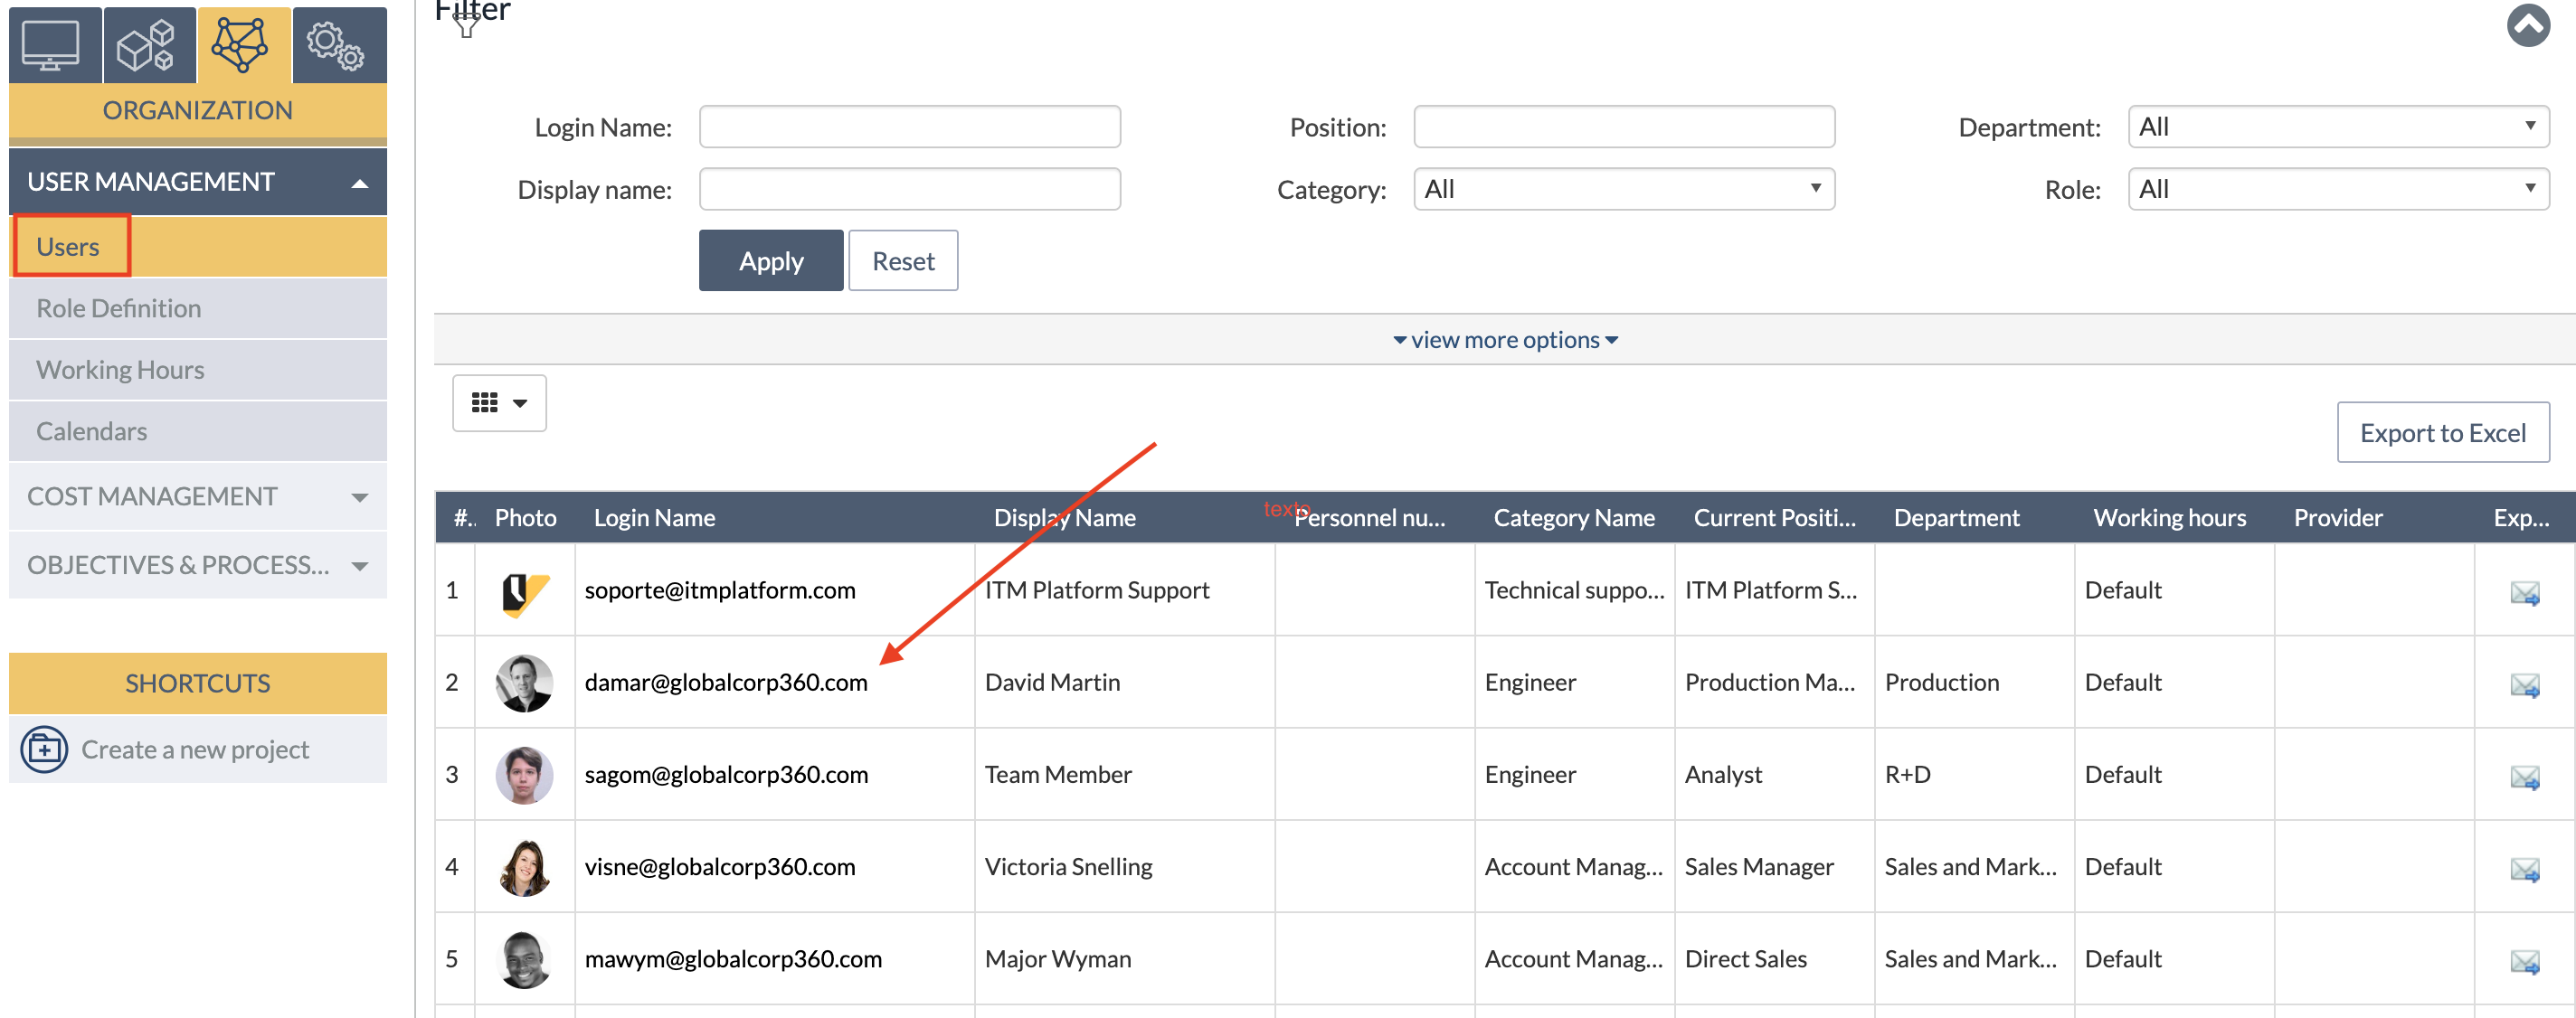
ITM Platform allows creating users who do not consume licenses, enabling you to plan and manage your efforts and costs and manage the user as a resource. These users are called no-login. You can create as many non-login users as you need without any limitations.
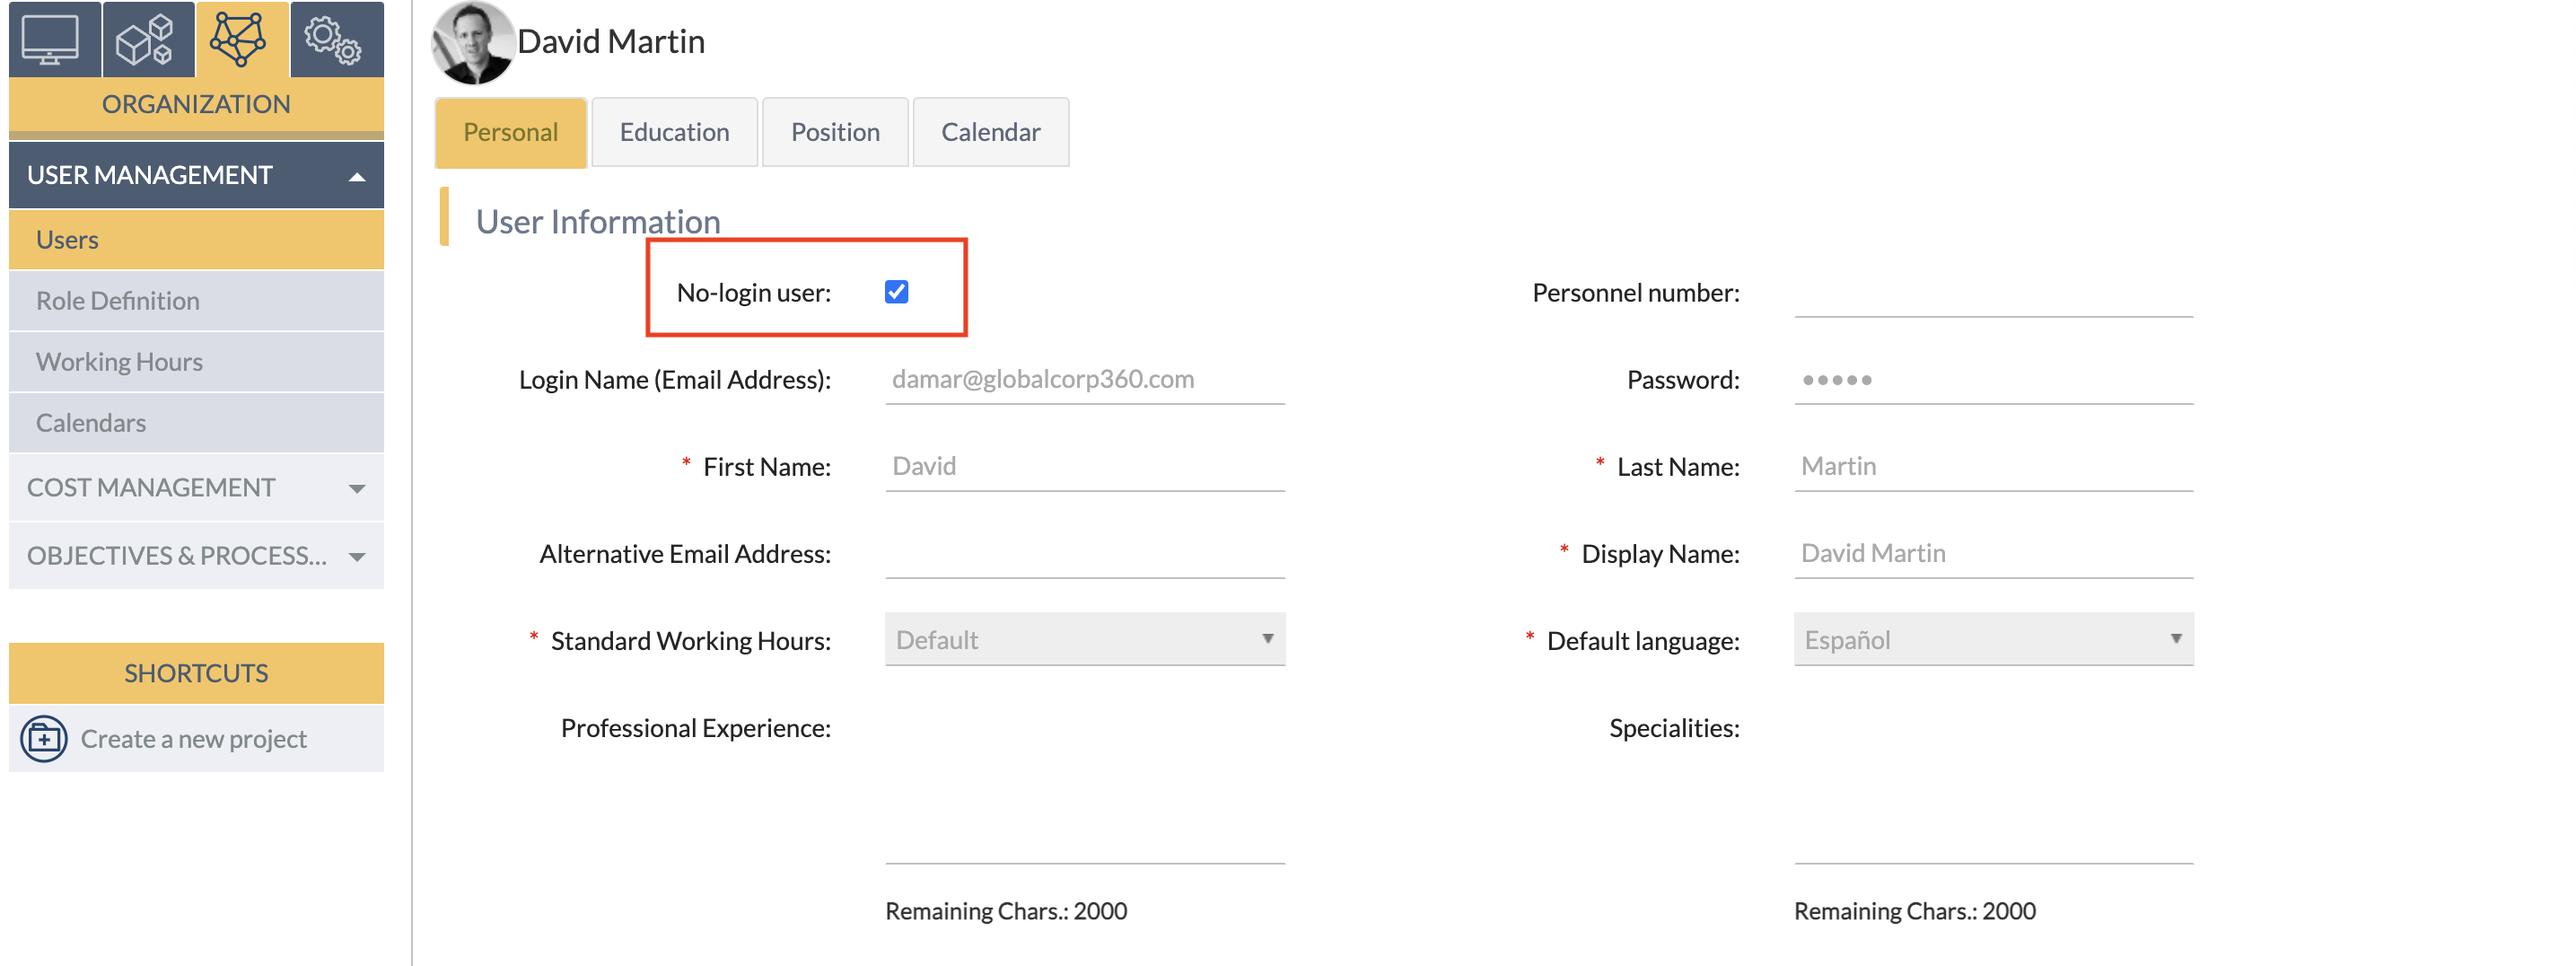
To do this, you will only have to select the no-login option at the time of user creation.
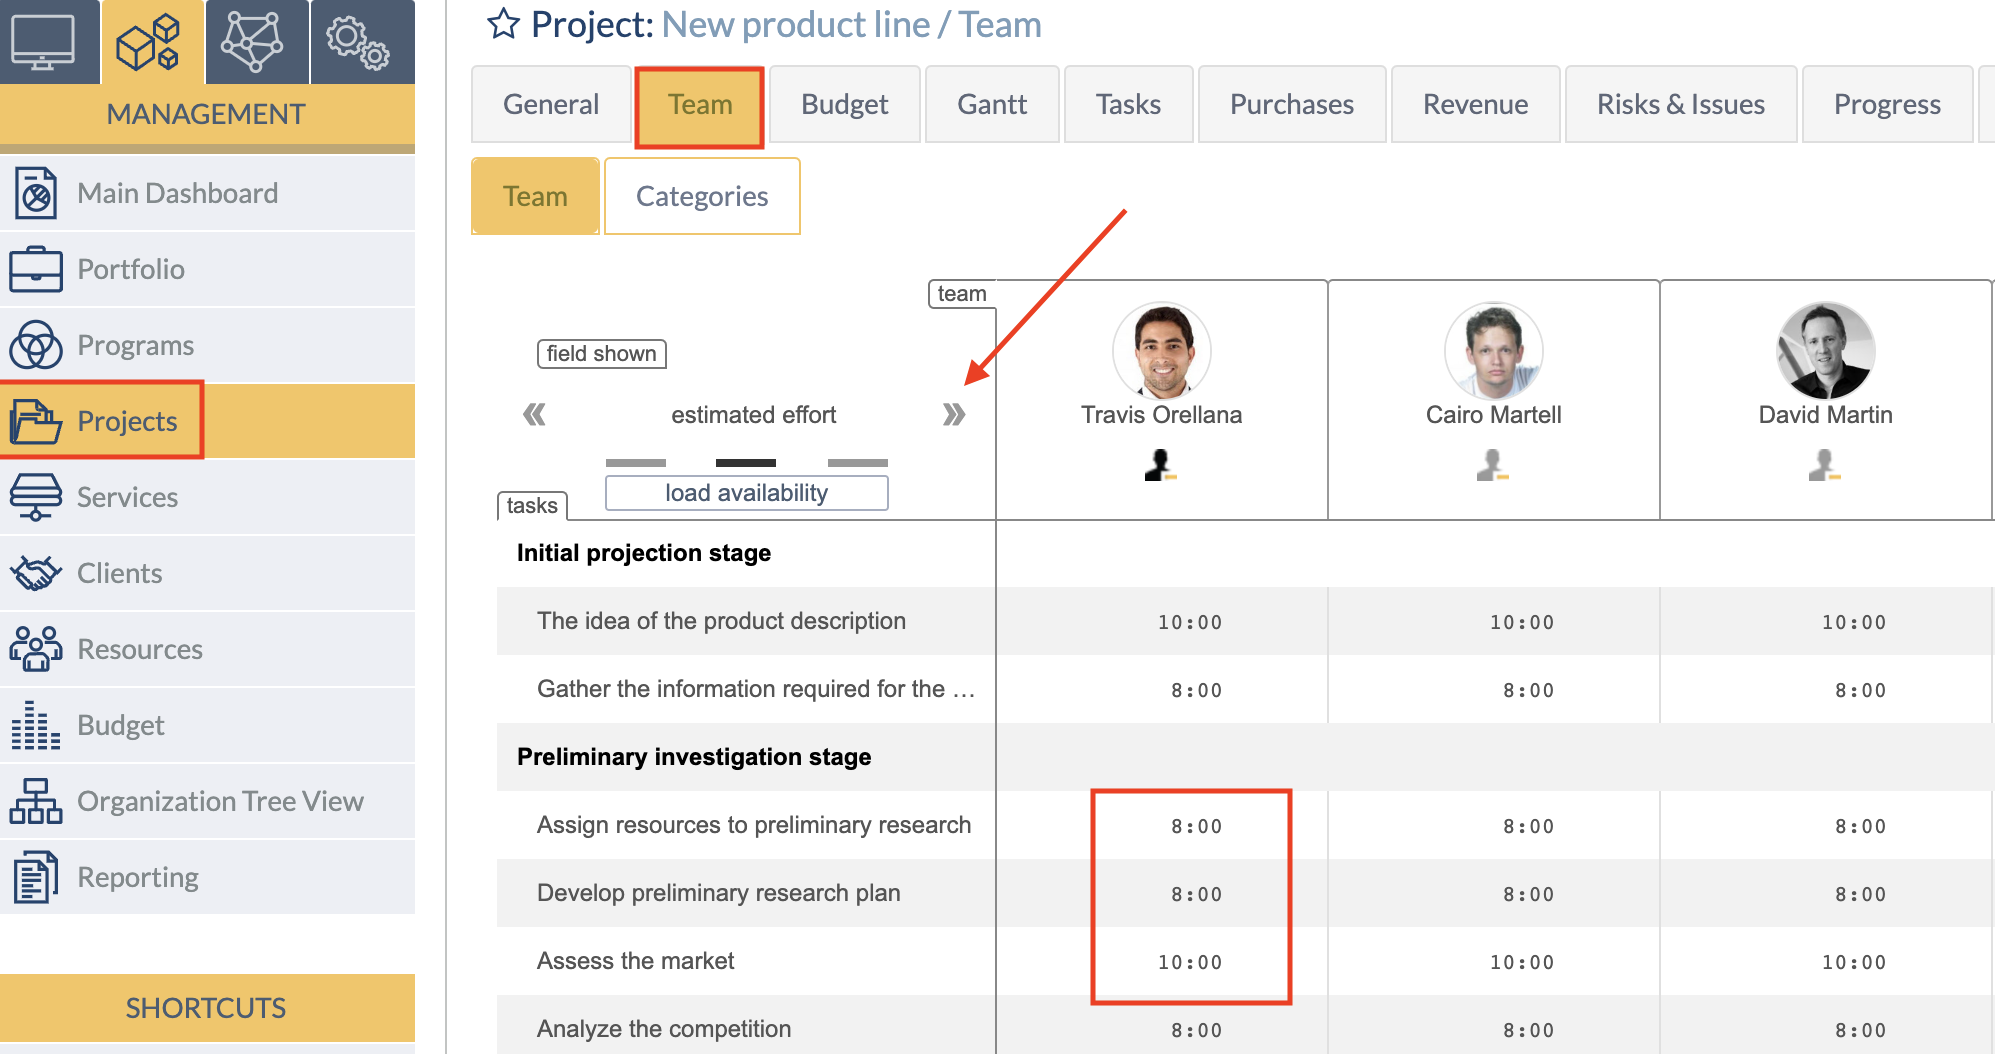
You can then add this user as a team member in a specific project and estimate the effort to be put into each task.
As well as reporting hours for the user:
Subsequently, you can analyze the hours assigned to this resource and know its profitability through custom reports and in the Resources section of the Management menu. No-login users will not be able to access the ITM Platform environment.
How to configure single sign-on using Azure AD (SAML2.0)
This guide will walk you through a standard SSO integration with Azure Active Directory as the Identity Provider (IdP) and ITM Platform as the Service Provider (Sdp). Before proceeding, we advise you to get familiar with the Single Sign-On process in ITM Platform.
Azure configuration
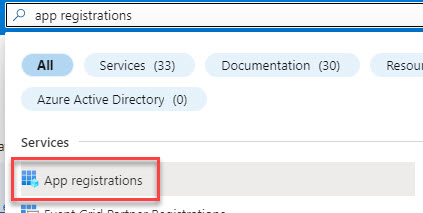
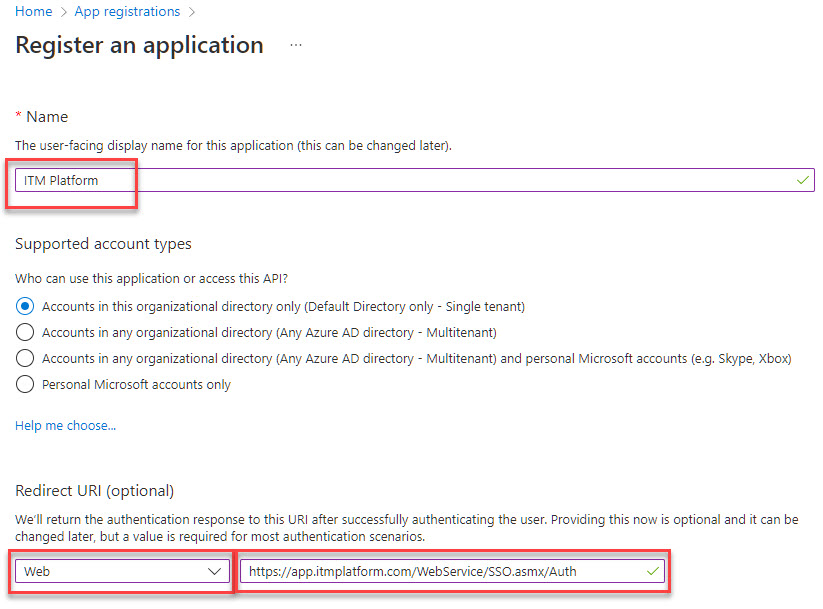
In your Azure portal, search for App Registrations and click on Create new app registration, or edit an existing one
Input a Name, and choose Web as the redirect URL, adding https://app.itmplatform.com/WebService/SSO.asmx/Auth
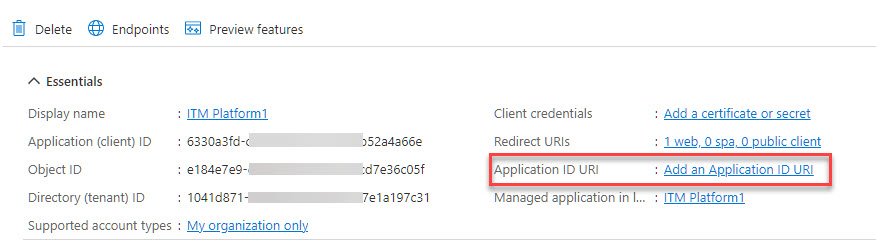
At this point, your application is generated. Now, Generate an Application ID URI by clicking on Add an Application ID:
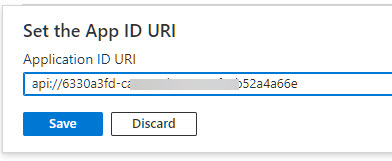
Click on set.
Accept the suggested URI or set your own, and save:
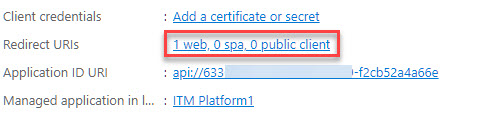
Click on Redirect URIs
Add https://app.itmplatform.com/ITM.Web/WebService/SSO.asmx/SignOut to the front-channel logout URL and save
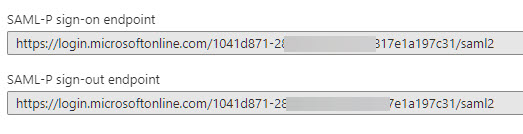
Copy the previously generated Application ID URI, and the SAML-P sign-on endpoint and SAML-P sign-out endpoint. To access all your endpoints, click on the Endpoints button of your registered app.
By now, you should have
Application ID URI
SAML-P sign-out endpoint
SAML-P sign-out endpoint
ITM Platform configuration
On the left menu, go to CONFIGURATION > ORGANIZATION > Company Settings. Scroll down to “Single Sign-On (SSO) Configuration”
Tick “Enable SSO”
We don’t recommend ticking “Force SSO for all users” until you have tested all works fine. Otherwise, you may be locked out. If this happens, please get in touch with support@itmplatform.com
Issuer: paste the “Application ID URI” provided by Azure
Login URL: paste the “SAML-P sign-on endpoint” provided by Azure
Logout URL: paste the “SAML-P sign-on endpoint” provided by Azure
If you generated a certificate in Azure, paste it in the Certificate field, as well as the SHA-256 fingerprint.
Save
To test it, log out and when prompted on the login page, click on “Login with SSO.” You should be redirected to Azure’s login page and fill out your credentials (we recommend you select “remember me” ). You will then be redirected to ITM Platform’s home page, and from then on, clicking on “Login with SSO” will lead you to ITM Platform’s home page.
A sprint is a dedicated period in which a set amount of tasks will be completed on a project.
Although sprints are traditionally associated with the agile methodology, specifically Scrum, ITM Platform supports sprints in Waterfall (Gantt) and Agile projects.
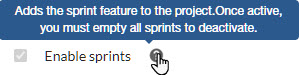
Go to the “General” tab, under the “Timeline” section, and tick the “Enable Sprints” checkbox
You can also enable sprints by default in a given project type. Go to CONFIGURATION > PARAMETERS > Project Parameters > Project Type, select the project type you need to customize and tick the “Enable sprints by default” checkbox.
Once sprints are active and populated with tasks, you will only be able to disable the sprint feature if all sprints are emptied first.
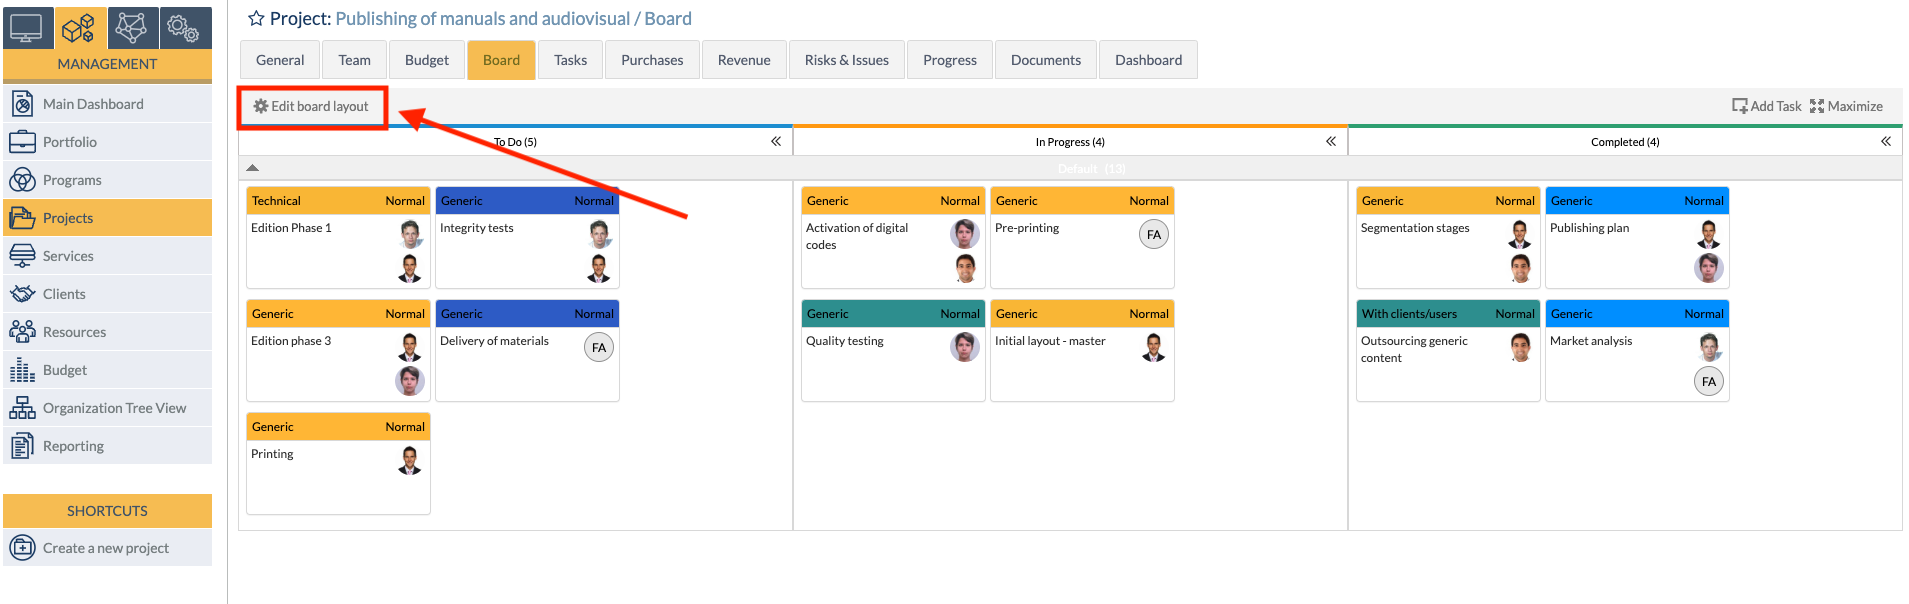
Once the sprint feature is enabled, you will notice a new “Sprints” tab and the presence of sprints across other features, such as the task list, the Board, or the Gantt chart.
The sprints tab
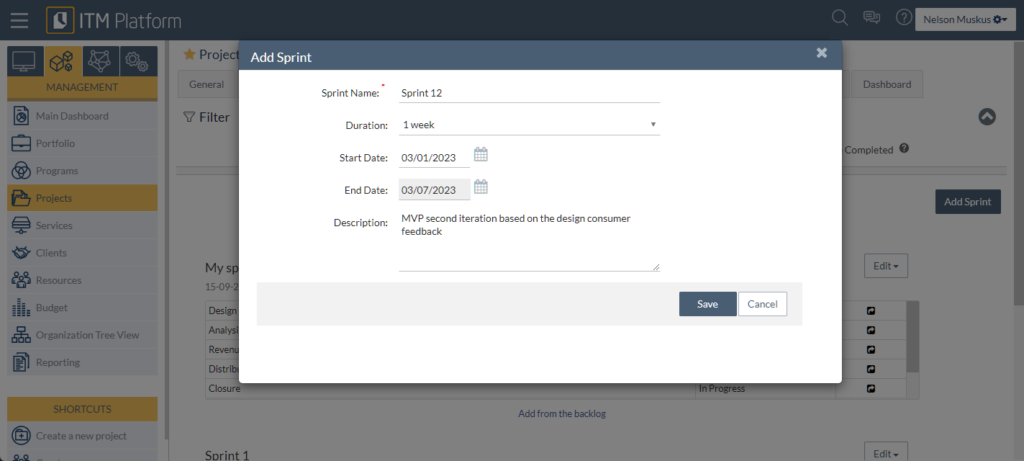
The sprint section offers a view of all sprints, allowing you to create and edit sprints and allocate tasks or send tasks to the backlog.
Sprint dates are flexible: you can set no dates, just a start date or both start and end dates.
The filter section will allow you to hide sprints whose tasks are all completed (in a completed status)
The task list
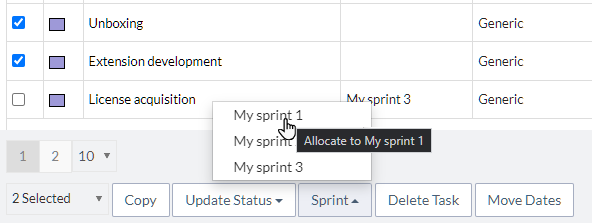
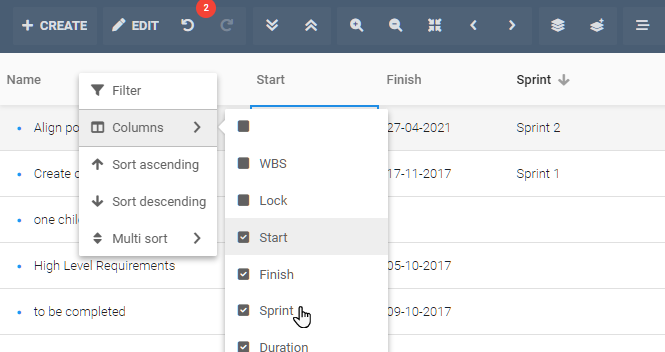
The tasks section has a “Sprint” field in the column selector, as well as a filter to display tasks allocated to one or more sprints.
From the task list, you can allocate multiple tasks to a sprint by selecting them, then clicking on the Sprint dropdown button and selecting the sprint that you want to allocate the tasks to.
You can allocate tasks already in a different sprint or in the backlog.
You cannot allocate archived tasks. You will need to move them out of the archive, then allocate them to a sprint.
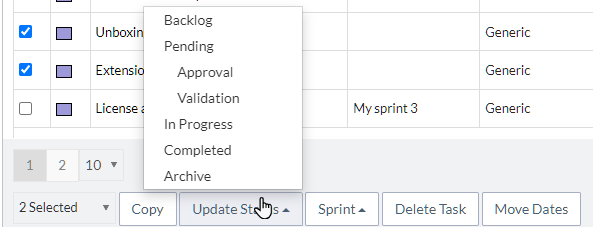
Similarly, you can move multiple tasks to the backlog or the archive following the same procedure but clicking on the “Update Status” button.
Tasks moved to the backlog or archive will be deallocated if previously allocated to a different sprint.
You can also create a sprint from the tasks section by clicking on the “Add New” button.
Clicking on a task will lead you to the task “General” section, from which you can also allocate or deallocate it from a sprint.
Agile projects
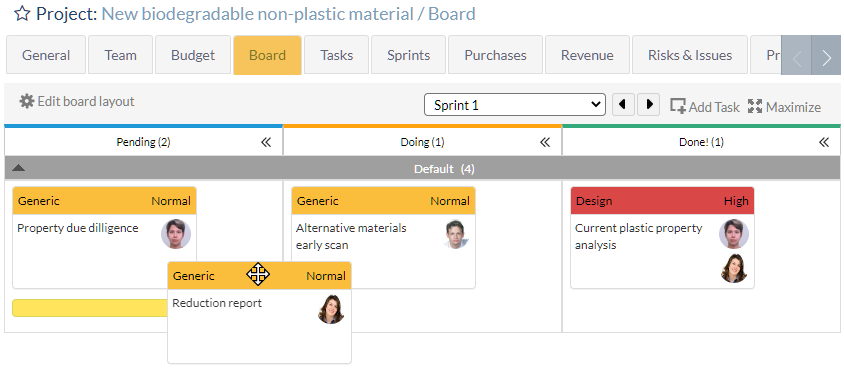
When the sprints feature is not enabled, an agile project will behave like a Kanban project: one single board containing all tasks in an operational status (all but backlog and archive).
When sprints are enabled, tasks can be allocated to sprints and the Board will display the tasks allocated to it
A typical workflow would imply assigning tasks to a “to-do” status, then as the team makes progress, tasks will flow to an “in-progress” status, then to a “completed” status.
From the Board, you can navigate sprints using the dropdown or the arrows.
Similarly, the project report section has the ability to filter all reports (tasks percentages, cumulative flow, burndown) by sprints, or the whole project
Progress reports will adapt to the sprint you have chosen.
Waterfall projects
Predictive projects can also take advantage of sprints, using the common features, plus filtering or sorting on the Gantt chart by sprint.
Reports, extensions, and API
Sprints are an entity in ITM Platform, just like projects or tasks. Therefore, you can create custom reports, extensions that react to changes or use the API to read, create, and manipulate sprints.</h3