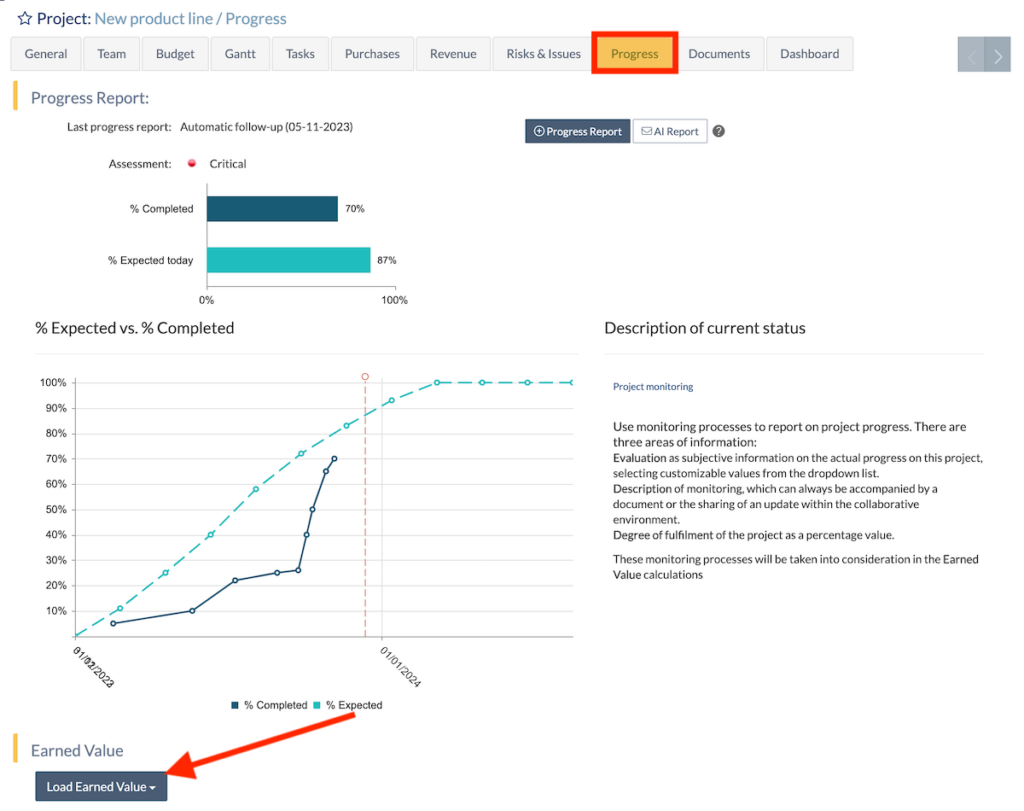
Slow or Delayed Project List Display
Occasionally, the project list may take longer than expected to display, sometimes taking up to two minutes in some instances.
Generally, the cause can be attributed to one of the reasons explained below or a combination of both:
- The presence of calculated fields in the requested list of columns.
- A high volume of projects in the list (more than 50) without pagination.
Calculated fields are not stored as data in ITM Platform but require processing to display a value.
A typical example of a calculated field is the “Budget Estimate.” To display this data, the system must go through:
- all the projects,
- for each project, all tasks,
- for each task, all team members,
- for each team member, all the daily hour reports,
- and for each report, verify the cost of the professional profile for that date.
Then, apply the cost to each hour of each day and accumulate costs upwards, including purchases if required. A project with 25 tasks, 4 people, and six months of duration requires about 20,000 calculation operations to provide the “Cost Estimate” field.
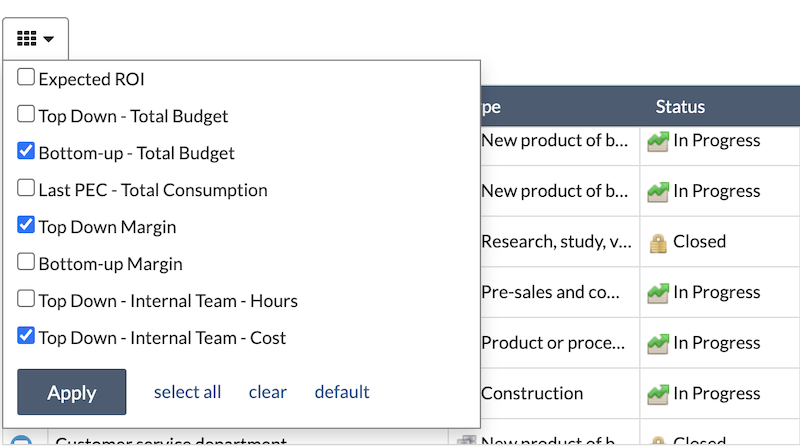
To solve the response time problem, select only calculated fields when necessary.
You can also use reports to generate high volumes of information or with calculated fields.
Concurrent or not with the above, another reason may be the number of projects requested on the list. All lists on ITM Platform offer the option to paginate so that the visible part is limited to a volume of 10, 20, 50, or 100 items.
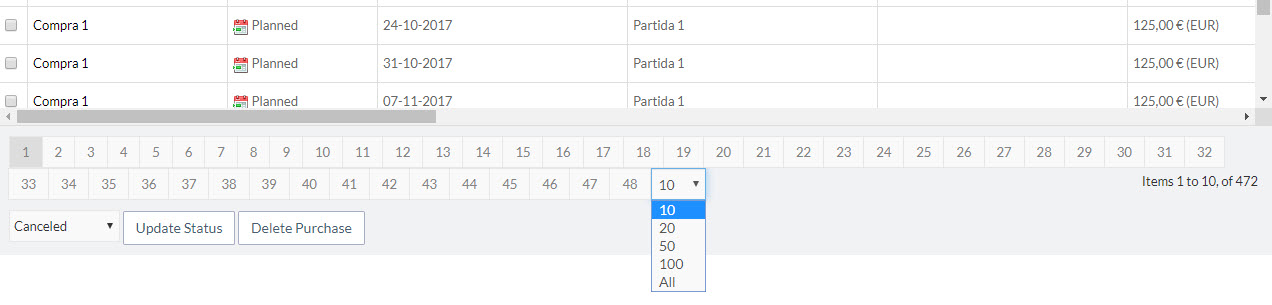 You also have the option to select all items but keep in mind that this will be at the expense of response speed.
If your list setup contains both cases (more than 50 projects and calculated fields), you should expect response times of over 30 seconds, potentially spanning several minutes, depending on the volume.
In general, lists of more than 20 items are not useful since the filtering system will allow you to obtain the information you need. Consider using these filters, the reporting system, or adding calculated fields and the complete list only when essential.